Home » Public Forums » GMCnet » [GMCnet] Engine removal hoist needed
| [GMCnet] Engine removal hoist needed [message #363683] |
Sun, 25 April 2021 08:05  |
 jkim.phd

Messages: 8
Registered: April 2021
Karma: 0
|
Junior Member |
|
|
Hello!
I need to remove my 455 engine from my 26 foot 1976 GMC MH due to terrible bottom end bearing/knocking noise and super low oil pressure. Engine starts and runs though.
Question: Does anyone in So California have the engine hoist (with or without the I-beam and trolley system) I can rent/borrow/buy?
I thought I’d ask here first before I go ahead and re-invent the wheel and build my own hoist. I am thinking of pulling the engine inside the coach. But I am open to suggestions. Once I build mine I’d be happy to share it with anyone who needs it.
I’m in Buena Park, CA
James
1976 GMC Motorhome 26’
_______________________________________________
GMCnet mailing list
Unsubscribe or Change List Options:
|
|
|
|
| Re: [GMCnet] Engine removal hoist needed [message #363712 is a reply to message #363683] |
Mon, 26 April 2021 08:36  |
Scott Nutter
Messages: 782
Registered: January 2015
Location: Houston/San Diego
Karma: 4
|
Senior Member |
|
|
James,
You also have the option of taking the engine out from below. That’s how mine was done. You basically need about 28 inches(estimated) of clearance.
The trick is to jack up the front and rear at the same time to avoid cracking or popping out the front windows.
Scott.
Scott Nutter
1978 Royale Center Kitchen, Patterson 455, switch pitch tranny, 3.21 final drive, Quad bags, Dave Lenzi super duty mid axle disc brakes, tankless water heater, everything Lenzi. Alex Ferrera installed MSD Atomic EFI
Houston, Texas
|
|
|
|
| [GMCnet] Re: Engine removal hoist needed [message #363713 is a reply to message #363712] |
Mon, 26 April 2021 08:50 |
jkim.phd
Messages: 8
Registered: April 2021
Karma: 0
|
Junior Member |
|
|
Thanks Scott!
When you removed your engine from below, did you not need a hoist to pull up and suspend the engine from inside the coach? Or were you able to do it with floor jacks all from below?
James
> On Apr 26, 2021, at 6:37 AM, Scott Nutter wrote:
>
> James,
> You also have the option of taking the engine out from below. That’s how mine was done. You basically need about 28 inches(estimated) of clearance.
> The trick is to jack up the front and rear at the same time to avoid cracking or popping out the front windows.
> Scott.
> --
> Scott Nutter
> 1978 Royale Center Kitchen, Patterson 455, switch pitch tranny, 3.21 final drive, Quad bags, tankless water heater, everything Lenzi. Alex Ferrera
> installed MSD Atomic EFI
> Houston, Texas
> _______________________________________________
> GMCnet mailing list
> Unsubscribe or Change List Options:
_______________________________________________
GMCnet mailing list
Unsubscribe or Change List Options:
|
|
|
|
|
|
| [GMCnet] Re: Engine removal hoist needed [message #363720 is a reply to message #363714] |
Mon, 26 April 2021 10:38 |
jkim.phd
Messages: 8
Registered: April 2021
Karma: 0
|
Junior Member |
|
|
In my situation, the interior was redone 20 years ago. Just two removable couches in front. I’ll have all the room inside. If I have to construct a hoist anyways, what would be the benefit of doing it through the bottom?
James
> On Apr 26, 2021, at 7:46 AM, Larry wrote:
>
> jkim.phd wrote on Mon, 26 April 2021 08:50
>> Thanks Scott!
>> When you removed your engine from below, did you not need a hoist to pull up and suspend the engine from inside the coach? Or were you able to do
>> it with floor jacks all from below?
>>
>> James
>
> I've had my engine out a number of times now. (3 bad engines from a builder). Each time I took it out the bottom. Started with putting the whole coach
> upon 8" ramps.
> http://www.gmcmhphotos.com/photos/ramps/p67419-on-ramps.html
> Used a steel frame inside over the engine compartment with two chain hoists. One for the engine, and one to lower the transmission. (You can use
> come-alongs but not as easy)
> http://www.gmcmhphotos.com/photos/misc-cadillac-500-install-solutions/p5887.html
> Lifted and supported the front of the coach for 30" of clearance
> http://www.gmcmhphotos.com/photos/misc-cadillac-500-install-solutions/p3773.html
> http://www.gmcmhphotos.com/photos/misc-cadillac-500-install-solutions/p3772.html
> Dropped the engine on a creeper, put a chain around it and dragged it out with my lawn tractor.
> Also, once slid it out on a piece of plywood. Only needed 28" to do that.
> Put the dinette down and covered it with several old shower curtains. Covered everything else in coach with old bed sheets and cut cardboard to fit
> the floor.
> A lot more details, but you can figure those things out.
> Just the way I did it.
>
>
> --
> Larry
> 78 Royale w/500 Caddy
> Menomonie, WI.
> _______________________________________________
> GMCnet mailing list
> Unsubscribe or Change List Options:
_______________________________________________
GMCnet mailing list
Unsubscribe or Change List Options:
|
|
|
|
| Re: [GMCnet] Engine removal hoist needed [message #363724 is a reply to message #363683] |
Mon, 26 April 2021 15:33 |
Scott Nutter
Messages: 782
Registered: January 2015
Location: Houston/San Diego
Karma: 4
|
Senior Member |
|
|
I don’t know what benefit of dropping the engine out the bottom. The only thing I can think of would be maybe keeping the inside cleaner? Possibly more of the experienced people will reply to this one.
Scott.
P.S, Larry is a very smart guy. His out the bottom procedure sounds very good.
Scott Nutter
1978 Royale Center Kitchen, Patterson 455, switch pitch tranny, 3.21 final drive, Quad bags, Dave Lenzi super duty mid axle disc brakes, tankless water heater, everything Lenzi. Alex Ferrera installed MSD Atomic EFI
Houston, Texas
|
|
|
|
| Re: [GMCnet] Engine removal hoist needed [message #363725 is a reply to message #363683] |
Mon, 26 April 2021 15:34 |
jhbridges
Messages: 8412
Registered: May 2011
Location: Braselton ga
Karma: -74
|
Senior Member |
|
|
With a hoist, comes easily out the top.
--johnny
Foolish Carriage, 76 26' Eleganza(?) with beaucoup mods and add - ons.
Braselton, Ga.
I forgive them all, save those who hurt the dogs. They must answer to me in hell
|
|
|
|
| Re: [GMCnet] Engine removal hoist needed [message #363727 is a reply to message #363724] |
Mon, 26 April 2021 18:09 |
rjw
Messages: 697
Registered: September 2005
Karma: 4
|
Senior Member |
|
|
Scott Nutter wrote on Mon, 26 April 2021 16:33I don’t know what benefit of dropping the engine out the bottom. The only thing I can think of would be maybe keeping the inside cleaner? Possibly more of the experienced people will reply to this one.
Scott.
P.S, Larry is a very smart guy. His out the bottom procedure sounds very good.
Being as I replaced my engine, transmission and final drive myself in my backyard I can comment.
The advantage for me was that I was able to drop all 3 components in one assembly. Then I took the intact power-train to my garage where I was able to separate the three and assemble a complete power-train (rebuilt motor, transmission and final drive) that I hoisted back up into position. I think doing it that way saved me time and effort. Of course you have to have a way to get enough room under the engine bay in order to get the stuff down.
http://www.palmbeachgmc.com/gmc/gmc_images/ramp2.jpg
http://www.palmbeachgmc.com/motor/motor_teardown/album/slides/DSCN8304.html
Richard
76 Palm Beach
SE Michigan
www.PalmBeachGMC.com
Roller Cam 455, TBI+EBL, 3.42 FD, 4 Bag, Macerator, Lenzi (brakes, vacuum system, front end stuff), Manny Tranny, vacuum step, Tankless + OEM water heaters.
|
|
|
|
| [GMCnet] Re: Engine removal hoist needed [message #363731 is a reply to message #363727] |
Mon, 26 April 2021 18:31 |
James Hupy
Messages: 6806
Registered: May 2010
Karma: -62
|
Senior Member |
|
|
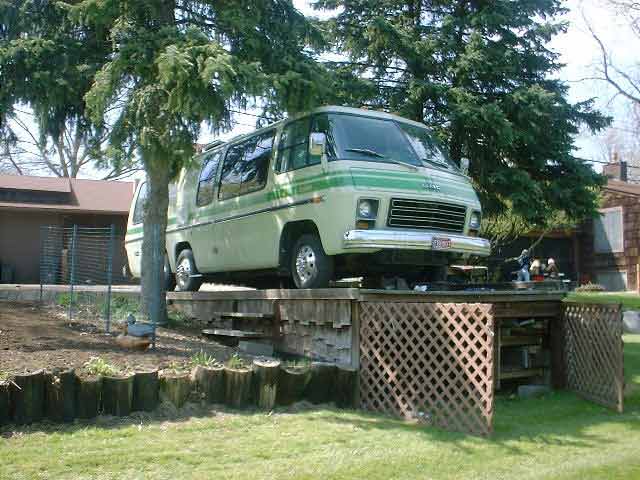
One of our more creative? members in the Seattle area needed to remove an
engine outside on their grass lawn, they solved the "out the bottom" method
with a back hoe. Left the coach on the ground, and dug out a space under
the coach in the lawn similar to a pit. Leveled out the bottom, lined it
with 3/4" plywood, and out she came.
Definitely not my way, but it worked for them. So I have seen just
about every method possible to r & r an engine. Out the top with a gantry
and rail, (my preferred method), take the entire front clip out from under
the coach by rolling it on the tires and wheels with trailing caster wheels
added, (if a lot of rust and worn suspension components are present) that
is a viable option, pits will work, as well as coach hoists. Depending upon
your skills and abilities, pick a method, and learn the same way many other
GMCers have. Busted knuckles, anti freeze in your hair, transmission fluid
all over your shop floor, etc.
Jim Hupy
Salem, Oregon
On Mon, Apr 26, 2021, 4:09 PM RJW wrote:
> Scott Nutter wrote on Mon, 26 April 2021 16:33
>> I don’t know what benefit of dropping the engine out the bottom. The
> only thing I can think of would be maybe keeping the inside cleaner?
>> Possibly more of the experienced people will reply to this one.
>> Scott.
>> P.S, Larry is a very smart guy. His out the bottom procedure sounds very
> good.
>
> Being as I replaced my engine, transmission and final drive myself in my
> backyard I can comment.
>
> The advantage for me was that I was able to drop all 3 components in one
> assembly. Then I took the intact power-train to my garage where I was able
> to
> separate the three and assemble a complete power-train (rebuilt motor,
> transmission and final drive) that I hoisted back up into position. I think
> doing it that way saved me time and effort. Of course you have to have a
> way to get enough room under the engine bay in order to get the stuff down.
>
> http://www.palmbeachgmc.com/gmc/gmc_images/ramp2.jpg
>
> http://www.palmbeachgmc.com/motor/motor_teardown/album/slides/DSCN8304.html
>
> --
> Richard
> 76 Palm Beach
> SE Michigan
> www.PalmBeachGMC.com
>
>
> Coop Roller Cam 455, Howell TBI + EBL, 3.42 FD, Quadra Bag, Macerator,
> Lenzi stuff, Manny Tranny etc.
> _______________________________________________
> GMCnet mailing list
> Unsubscribe or Change List Options:
>
_______________________________________________
GMCnet mailing list
Unsubscribe or Change List Options:
|
|
|
|
|
|
| Re: [GMCnet] Engine removal hoist needed [message #363734 is a reply to message #363732] |
Tue, 27 April 2021 16:23 |
tphipps
Messages: 3005
Registered: August 2004
Location: Spanish Fort, AL
Karma: 9
|
Senior Member |
|
|
IF you choose to remove it out the top and down the aisle, much easier if you remove the front seats. Not difficult and really adds room.
Cover the floor with old carpeting is also a good idea.
Tom
2012 Phoenix Cruiser model 2552
KA4CSG
|
|
|
|
| Re: [GMCnet] Engine removal hoist needed [message #363735 is a reply to message #363732] |
Tue, 27 April 2021 18:48 |
dsmithy
Messages: 210
Registered: July 2012
Location: Lincoln Nebraska
Karma: 0
|
Senior Member |
|
|
Matt,
Do you mean Dave advocates removing the whole front end, frame sections, suspension, the works?? Sounds great, but can you give us any more detail?
Douglas & Virginia Smith,
dsmithy18 at gmail,
Lincoln Nebraska,
’73 “Sequoia” since ‘95: "Wanabizo";
Quadrabag/6 wheel disks/3:70 final/Paterson QuadraJet/Thorley’s/Alloy wheels/Sundry other
|
|
|
|
| Re: [GMCnet] Engine removal hoist needed [message #363740 is a reply to message #363735] |
Wed, 28 April 2021 14:25 |
 |
Matt Colie

Messages: 8547
Registered: March 2007
Location: S.E. Michigan
Karma: 7
|
Senior Member |
|
|
dsmithy wrote on Tue, 27 April 2021 19:48Matt,
Do you mean Dave advocates removing the whole front end, frame sections, suspension, the works?? Sounds great, but can you give us any more detail?
Doug,
Not a lot of detail to give if you have spent any time under there.....
Write a complete list of everything you have wanted to do in the engine room. You may never have this opportunity again.
Have digital camera handy and try to take too many pictures. I missed a bunch of the detail of the FEAD assembly and how the brake lines were routed.
By the lines:
The main engine battery has to come out and the house bank on a 23.
You have to remove the battery try and the steering box.
Take the lines off the master cylinder and disconnect the brake line to the rear. Pay attention to where these route and mount.
Disconnect the fuel line and the vapor vent line where they come forward.
Where you break the exhaust is your choice.
Remove the shift and throttle cables.
Both the cab heater and water heater lines have to be cleared away.
As well as disconnect the lines to the A/C compressor and its electric end.
Tires won't clear, but bare rims did.
Remove the bumper (easier at the two big bolts), the grill and the filler piece under that.
Up on top of the engine there are many vacuum lines and electrical connections.
I unloaded the torsion bars. I measured the protruding adjusting bolt and reset it to the same place.
If you choose, I am told that you can unbolt the torsion bar anchor frame and bring it out still loaded.
You may have to disconnect the parking brake cable. (I am unsure at this point.)
Support the frame on wood over a long area behind the frame splices.
The air filter housing and distributor cap should clear, but I never took that risk.
The cab supports are a single bolt in a rubber mount, but there is usually a grounding strap at one of those.
Be ready...
Remove the twelve fasteners at the frame splice and have the front frame supported on moveable things. (I used a combination of floor jacks and my Go-jacks with some wood cribbing. They could not help with lifting.)
Now look it over carefully to see what you missed.
Pull the entire front forward a little and look again for something that is hung up (BTDT)
When the package is clear, you have unbelievable access to the power plant. There is enough room to get serious with the blue wench to get the exhaust apart.
It is not necessary to support the cab area, but I am sort of (OK Really) paranoid so I cut and wedged a couple of 2*4s under it.
One of the best parts is the "ship in a bottle" aspect of reassembling the FEAD is just not an issue.
When I was ready to put the power plant back together and test run it, I just jury rigged fuel, electric and some temperature instruments, and spun it around so the exhaust was pointed out the door and did the test run and cam break-in right there. (And chased down a small lube oil leak.)
Unfortunately, I got to do this twice separated by about a year. My front frame got bent when we broke a lower control arm and hit the median and ~60 into a 4' deep drain. Chaumière is again road worthy and her pleasant self, but I still have some cosmetic work to do.
This is is pretty complete list, but I am sure that I missed something.
Before you put it back in, punch a big hole in the top of the bell housing and mark the ring gear so timing will now be simple. I really am going to write this up some day, but I keep forgetting to get better pictures than I have now.
Hope this is a help to someone.
Matt
Matt & Mary Colie - Chaumière -'73 Glacier 23 - Members GMCMI, GMCGL, GMCES
Electronically Controlled Quiet Engine Cooling Fan with OE Rear Drum Brakes with Applied Control Arms
SE Michigan - Near DTW - Twixt A2 and Detroit
|
|
|
|
| [GMCnet] Re: Engine removal hoist needed [message #363742 is a reply to message #363740] |
Wed, 28 April 2021 15:50 |
jkim.phd
Messages: 8
Registered: April 2021
Karma: 0
|
Junior Member |
|
|
Acronym Definition
FEAD Front End Accessory Drive
FEAD Front Engine Accessory Drive (automotive)
> On Apr 28, 2021, at 12:25 PM, Matt Colie wrote:
>
> dsmithy wrote on Tue, 27 April 2021 19:48
>> Matt,
>> Do you mean Dave advocates removing the whole front end, frame sections, suspension, the works?? Sounds great, but can you give us any more
>> detail?
>
> Doug,
>
> Not a lot of detail to give if you have spent any time under there.....
> Write a complete list of everything you have wanted to do in the engine room. You may never have this opportunity again.
> Have digital camera handy and try to take too many pictures. I missed a bunch of the detail of the FEAD assembly and how the brake lines were
> routed.
>
> By the lines:
> The main engine battery has to come out and the house bank on a 23.
> You have to remove the battery try and the steering box.
> Take the lines off the master cylinder and disconnect the brake line to the rear. Pay attention to where these route and mount.
> Disconnect the fuel line and the vapor vent line where they come forward.
> Where you break the exhaust is your choice.
> Remove the shift and throttle cables.
> Both the cab heater and water heater lines have to be cleared away.
> As well as disconnect the lines to the A/C compressor and its electric end.
> Tires won't clear, but bare rims did.
> Remove the bumper (easier at the two big bolts), the grill and the filler piece under that.
> Up on top of the engine there are many vacuum lines and electrical connections.
> I unloaded the torsion bars. I measured the protruding adjusting bolt and reset it to the same place.
> If you choose, I am told that you can unbolt the torsion bar anchor frame and bring it out still loaded.
> You may have to disconnect the parking brake cable. (I am unsure at this point.)
> Support the frame on wood over a long area behind the frame splices.
> The air filter housing and distributor cap should clear, but I never took that risk.
> The cab supports are a single bolt in a rubber mount, but there is usually a grounding strap at one of those.
> Be ready...
> Remove the twelve fasteners at the frame splice and have the front frame supported on moveable things. (I used a combination of floor jacks and my
> Go-jacks with some wood cribbing. They could not help with lifting.)
> Now look it over carefully to see what you missed.
> Pull the entire front forward a little and look again for something that is hung up (BTDT)
>
> When the package is clear, you have unbelievable access to the power plant. There is enough room to get serious with the blue wench to get the
> exhaust apart.
> It is not necessary to support the cab area, but I am sort of (OK Really) paranoid so I cut and wedged a couple of 2*4s under it.
>
> One of the best parts is the "ship in a bottle" aspect of reassembling the FEAD is just not an issue.
>
> When I was ready to put the power plant back together and test run it, I just jury rigged fuel, electric and some temperature instruments, and spun it
> around so the exhaust was pointed out the door and did the test run and cam break-in right there. (And chased down a small lube oil leak.)
>
> Unfortunately, I got to do this twice separated by about a year. My front frame got bent when we broke a lower control arm and hit the median and ~60
> into a 4' deep drain. Chaumière is again road worthy and her pleasant self, but I still have some cosmetic work to do.
>
> This is is pretty complete list, but I am sure that I missed something.
>
> Before you put it back in, punch a big hole in the top of the bell housing and mark the ring gear so timing will now be simple. I really am going to
> write this up some day, but I keep forgetting to get better pictures than I have now.
>
> Hope this is a help to someone.
>
> Matt
> --
> Matt & Mary Colie - Chaumière -'73 Glacier 23 - Members GMCMI, GMCGL, GMCES
> Electronically Controlled Quiet Engine Cooling Fan with OE Rear Drum Brakes with Applied Control Arms
> SE Michigan - Near DTW - Twixt A2 and Detroit
> _______________________________________________
> GMCnet mailing list
> Unsubscribe or Change List Options:
_______________________________________________
GMCnet mailing list
Unsubscribe or Change List Options:
|
|
|
|
| [GMCnet] Re: Engine removal hoist needed [message #363743 is a reply to message #363740] |
Wed, 28 April 2021 17:36 |
dsmithy
Messages: 210
Registered: July 2012
Location: Lincoln Nebraska
Karma: 0
|
Senior Member |
|
|
Just exactly what I was looking for Matt. Thanks.
> On Apr 28, 2021, at 2:25 PM, Matt Colie wrote:
>
> dsmithy wrote on Tue, 27 April 2021 19:48
>> Matt,
>> Do you mean Dave advocates removing the whole front end, frame sections, suspension, the works?? Sounds great, but can you give us any more
>> detail?
>
> Doug,
>
> Not a lot of detail to give if you have spent any time under there.....
> Write a complete list of everything you have wanted to do in the engine room. You may never have this opportunity again.
> Have digital camera handy and try to take too many pictures. I missed a bunch of the detail of the FEAD assembly and how the brake lines were
> routed.
>
> By the lines:
> The main engine battery has to come out and the house bank on a 23.
> You have to remove the battery try and the steering box.
> Take the lines off the master cylinder and disconnect the brake line to the rear. Pay attention to where these route and mount.
> Disconnect the fuel line and the vapor vent line where they come forward.
> Where you break the exhaust is your choice.
> Remove the shift and throttle cables.
> Both the cab heater and water heater lines have to be cleared away.
> As well as disconnect the lines to the A/C compressor and its electric end.
> Tires won't clear, but bare rims did.
> Remove the bumper (easier at the two big bolts), the grill and the filler piece under that.
> Up on top of the engine there are many vacuum lines and electrical connections.
> I unloaded the torsion bars. I measured the protruding adjusting bolt and reset it to the same place.
> If you choose, I am told that you can unbolt the torsion bar anchor frame and bring it out still loaded.
> You may have to disconnect the parking brake cable. (I am unsure at this point.)
> Support the frame on wood over a long area behind the frame splices.
> The air filter housing and distributor cap should clear, but I never took that risk.
> The cab supports are a single bolt in a rubber mount, but there is usually a grounding strap at one of those.
> Be ready...
> Remove the twelve fasteners at the frame splice and have the front frame supported on moveable things. (I used a combination of floor jacks and my
> Go-jacks with some wood cribbing. They could not help with lifting.)
> Now look it over carefully to see what you missed.
> Pull the entire front forward a little and look again for something that is hung up (BTDT)
>
> When the package is clear, you have unbelievable access to the power plant. There is enough room to get serious with the blue wench to get the
> exhaust apart.
> It is not necessary to support the cab area, but I am sort of (OK Really) paranoid so I cut and wedged a couple of 2*4s under it.
>
> One of the best parts is the "ship in a bottle" aspect of reassembling the FEAD is just not an issue.
>
> When I was ready to put the power plant back together and test run it, I just jury rigged fuel, electric and some temperature instruments, and spun it
> around so the exhaust was pointed out the door and did the test run and cam break-in right there. (And chased down a small lube oil leak.)
>
> Unfortunately, I got to do this twice separated by about a year. My front frame got bent when we broke a lower control arm and hit the median and ~60
> into a 4' deep drain. Chaumière is again road worthy and her pleasant self, but I still have some cosmetic work to do.
>
> This is is pretty complete list, but I am sure that I missed something.
>
> Before you put it back in, punch a big hole in the top of the bell housing and mark the ring gear so timing will now be simple. I really am going to
> write this up some day, but I keep forgetting to get better pictures than I have now.
>
> Hope this is a help to someone.
>
> Matt
> --
> Matt & Mary Colie - Chaumière -'73 Glacier 23 - Members GMCMI, GMCGL, GMCES
> Electronically Controlled Quiet Engine Cooling Fan with OE Rear Drum Brakes with Applied Control Arms
> SE Michigan - Near DTW - Twixt A2 and Detroit
> _______________________________________________
> GMCnet mailing list
> Unsubscribe or Change List Options:
_______________________________________________
GMCnet mailing list
Unsubscribe or Change List Options:
Douglas & Virginia Smith,
dsmithy18 at gmail,
Lincoln Nebraska,
’73 “Sequoia” since ‘95: "Wanabizo";
Quadrabag/6 wheel disks/3:70 final/Paterson QuadraJet/Thorley’s/Alloy wheels/Sundry other
|
|
|
|
Goto Forum:
Current Time: Fri Oct 04 12:25:25 CDT 2024
Total time taken to generate the page: 0.01690 seconds
|
 GMCforum
