Home » Public Forums » GMCnet » Redoing the cabinets
| Redoing the cabinets [message #235088] |
Sat, 04 January 2014 18:10  |
 kerry pinkerton

Messages: 2565
Registered: July 2012
Location: Harvest, Al
Karma: 15
|
Senior Member |
|
|
When we got back from Branson I decided to redo the interior, build a bunk with a flip up dining table, new headliner, and fix some leaks. Life and a few orders for my metal shaping stuff has delayed things but now I am on the cabinets.
My cabinets were less than optimal. The PO added some cabinets over the front side windows and they don't match and are in sad shape. Further, they stick too far forward to recline the seats, and by the door I'm always hitting my head on them
So I took them down. The ends especially were pretty much junk.
http://www.gmcmhphotos.com/photos/data/6502/H_0051.jpg
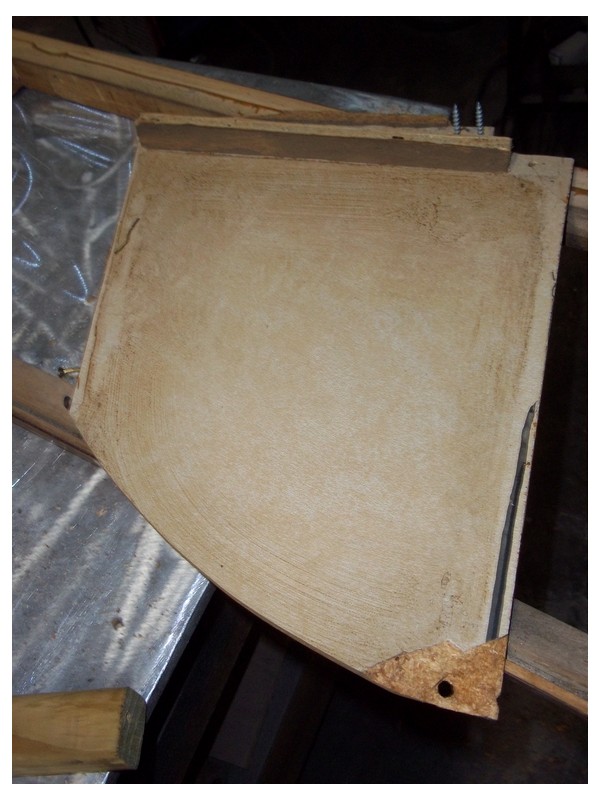
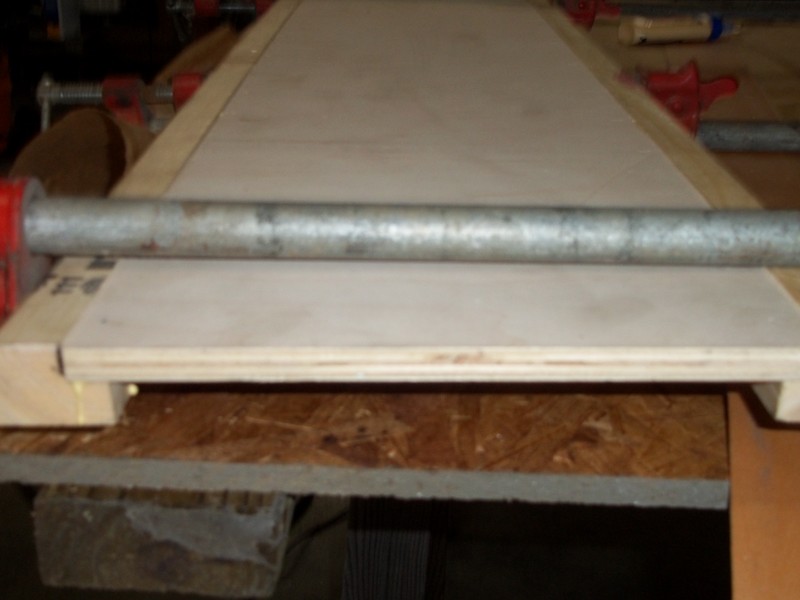
I wanted to paint them a different color and didn't especially want to build them all from scratch, so I replaced the bad particle board. Because paint doesn't stick to formica, I bought some iron on veneer as well as some 4x8 sheets of birch veneer. The big stuff goes on with contact cement.
=http://www.gmcmhphotos.com/photos/data/6502H_0032.jpg
http://www.gmcmhphotos.com/photos/data/6502/H_0022.jpg
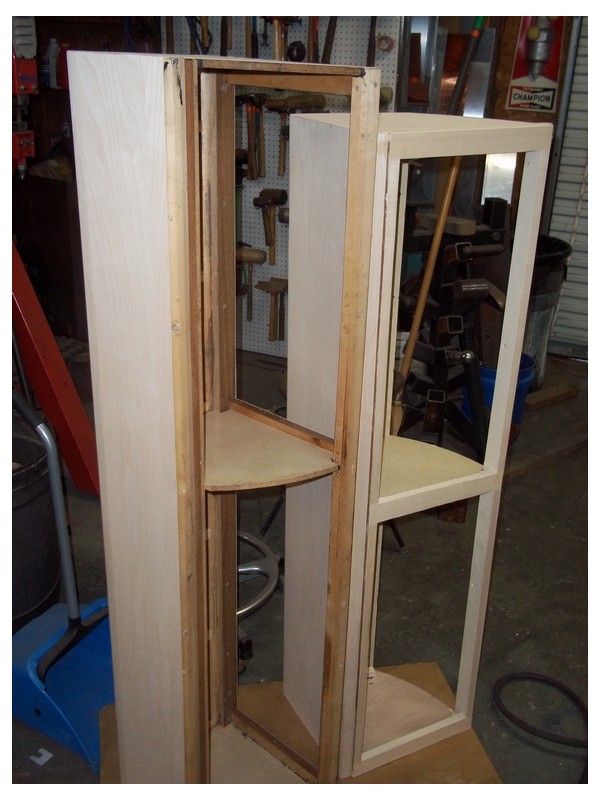
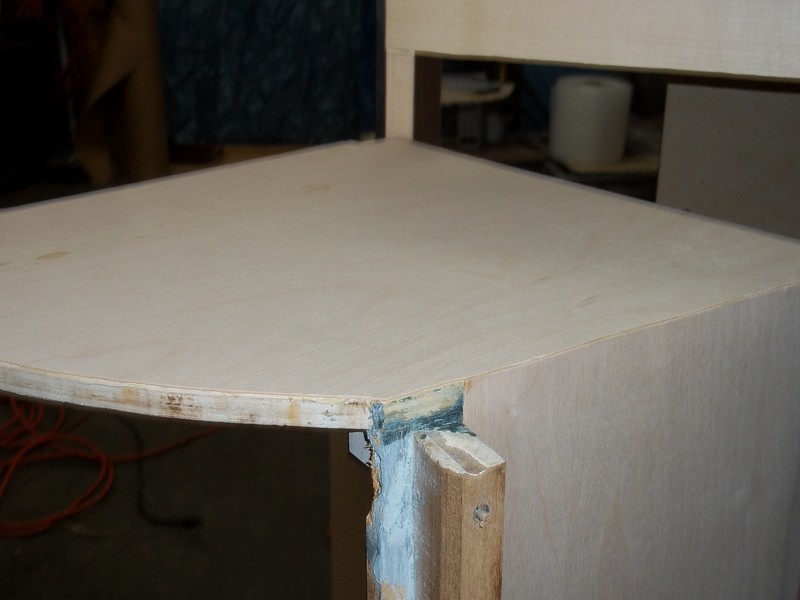
The original top cabinet over the kitchen counter was just junk and self destructed as I removed it. We're lucky it had not fallen apart while driving down the road.
Anyway, I had to build it from scratch all except the the front opening.
=http://www.gmcmhphotos.com/photos/data/6502H_0012.jpg
http://www.gmcmhphotos.com/photos/data/6502/H_0061.jpg

http://www.gmcmhphotos.com/photos/data/6502/H_0071.jpg

The black stuff is panel adhesive. All that will be sanded smooth. This cabinet has ends that won't be seen so I don't have to veneer them.
I'm making all new doors and drawer fronts. The ole formica covered front frame will be veneered with the iron on birch and painted. I've used this iron on laminate before with great results.
I'm still undecided on what to paint them with. I would like to use a urethane that I can spray on and may end up with that. I'd prefer a slick finish with minimal brush strokes. The problem is that I haven't found a local source for a tintable urethane other than automotive paint. Might end up that way. Any ideas or alternatives?
Kerry Pinkerton - North Alabama
Had 5 over the years. Currently have a '06 Fleetwood Discovery 39L
|
|
|
|
|
|
|
|
| Re: [GMCnet] Redoing the cabinets [message #235336 is a reply to message #235088] |
Tue, 07 January 2014 02:11  |
Steve Jess
Messages: 169
Registered: April 2012
Karma: 0
|
Senior Member |
|
|
Kerry,
Excellent info on the cabinet restoration. I hope to do mine in a similar way some day.
Now, a suggestion: instead of posting a link to the picture, if you post a link to the web page the photo is on, then viewers can also see the comments and easily move to the other pictures.
Like so: http://www.gmcmhphotos.com/photos/new-cabinets-interior-mods/p52263-misc-repairs-renovations-to-the-interior.html
Steve Jess - Aguanga, CA
1977 GMC Palm Beach "The DreamLiner"The 10,000 pound antique Home Theater with plumbing
> To: gmclist@temp.gmcnet.org
> From: Pinkertonk@MCHSI.com
> Date: Sat, 4 Jan 2014 18:10:41 -0600
> Subject: [GMCnet] Redoing the cabinets
>
>
>
> When we got back from Branson I decided to redo the interior, build a bunk with a flip up dining table, new headliner, and fix some leaks. Life and a few orders for my metal shaping stuff has delayed things but now I am on the cabinets.
>
> My cabinets were less than optimal. The PO added some cabinets over the front side windows and they don't match and are in sad shape. Further, they stick too far forward to recline the seats, and by the door I'm always hitting my head on them
>
> So I took them down. The ends especially were pretty much junk.
>
> http://www.gmcmhphotos.com/photos/data/6502/H_0051.jpg
>
>
> I wanted to paint them a different color and didn't especially want to build them all from scratch, so I replaced the bad particle board. Because paint doesn't stick to formica, I bought some iron on veneer as well as some 4x8 sheets of birch veneer. The big stuff goes on with contact cement.
>
> =http://www.gmcmhphotos.com/photos/data/6502H_0032.jpg
>
>
> http://www.gmcmhphotos.com/photos/data/6502/H_0022.jpg
>
>
> The original top cabinet over the kitchen counter was just junk and self destructed as I removed it. We're lucky it had not fallen apart while driving down the road.
>
> Anyway, I had to build it from scratch all except the the front opening.
>
> =http://www.gmcmhphotos.com/photos/data/6502H_0012.jpg
>
>
> http://www.gmcmhphotos.com/photos/data/6502/H_0061.jpg
>
>
> http://www.gmcmhphotos.com/photos/data/6502/H_0071.jpg
>
>
> The black stuff is panel adhesive. All that will be sanded smooth. This cabinet has ends that won't be seen so I don't have to veneer them.
>
> I'm making all new doors and drawer fronts. The ole formica covered front frame will be veneered with the iron on birch and painted. I've used this iron on laminate before with great results.
>
> I'm still undecided on what to paint them with. I would like to use a urethane that I can spray on and may end up with that. I'd prefer a slick finish with minimal brush strokes. The problem is that I haven't found a local source for a tintable urethane other than automotive paint. Might end up that way. Any ideas or alternatives?
> --
> Kerry Pinkerton
>
> North Alabama, near Huntsville,
>
> 77 Eleganza II, "The Lady", 403CI, also a 76 Eleganza being re-bodied as an Art Deco car hauler
> _______________________________________________
> GMCnet mailing list
> Unsubscribe or Change List Options:
> http://temp.gmcnet.org/cgi-bin/mailman/listinfo/gmclist
_______________________________________________
GMCnet mailing list
Unsubscribe or Change List Options:
http://temp.gmcnet.org/cgi-bin/mailman/listinfo/gmclist
|
|
|
|
|
|
| Re: [GMCnet] Redoing the cabinets [message #235354 is a reply to message #235336] |
Tue, 07 January 2014 08:56 |
kerry pinkerton
Messages: 2565
Registered: July 2012
Location: Harvest, Al
Karma: 15
|
Senior Member |
|
|
| Steve Jess wrote on Tue, 07 January 2014 02:11 |
...a suggestion: instead of posting a link to the picture, if you post a link to the web page the photo is on, then viewers can also see the comments and easily move to the other pictures....
|
thanks Jess. The problem with links only is that the forum users have to go through the photo site to see the photos and read the text. Unfortunately, the photo site does not allow us to present the material is quite as good a format. That is, it's harder to get the photos to display in the correct order. The way I do it shows a link to each photo in the desired order for the email guys and the forum users see the photos imbedded with the text. Double work for the poster but a better overall solution for this double formatted group (semi integrated email and forum).
Thanks for the link to the lacquer Robert. I've made a decision on what I'm going to do...we'll see how well it works.
I've decided to use automotive paints that I can spray on. I had a gallon of acrylic enamel in white that I had never used. My paint guy was able to tint it. It's pretty high dollar stuff and I am glad to be able to use it before it went bad. Once the hardener is added, acrylic enamel becomes urethane which is a TOUGH tough paint. I'll also use urethane high build primer on the bare wood and sand until smooth before the top coat.
Kerry Pinkerton - North Alabama
Had 5 over the years. Currently have a '06 Fleetwood Discovery 39L
|
|
|
|
|
|
|
|
|
|
| Re: [GMCnet] Redoing the cabinets [message #235870 is a reply to message #235855] |
Sat, 11 January 2014 19:10 |
sgltrac
Messages: 2797
Registered: April 2011
Karma: 1
|
Senior Member |
|
|
What is your floor plan again Kerry ?
Todd Sullivan
Sully
77 royale
Seattle
> On Jan 11, 2014, at 3:18 PM, Kerry Pinkerton <Pinkertonk@MCHSI.com> wrote:
>
>
>
> Got the overhead cabinets built and most in primer. I'll do two coats of urethane automotive primer sanding between coats before I do the color.
>
> While waiting for things to dry, I pulled the headliner out from the bath module forward. Man there is a large lack of foam insulation in there. 8o
>
> The next thing in the coach is to find my leaks. We had a good rain last night and things were wet in the usual places, ie behind the drivers/pass seats and on the kitchen counter. Big leak on the kitchen counter. It has a back splash the rear of the coach is down on the drivers side. Water was about an inch deep in the rear corner of the countertop. I'm kind of stumped as to how the water gets there because the countertop sits away from the wall and there were no stains on the headliner. It MIGHT be the exhaust vent but I'm thinking it's sealed pretty well. This was a lot of water, probably a quart or two.
>
> The weather is supposed to be pretty good next week so I'm going to rig up a pressure fan and do the soap bubble bit.
> --
> Kerry Pinkerton
>
> North Alabama, near Huntsville,
>
> 77 Eleganza II, "The Lady", 403CI, also a 76 Eleganza being re-bodied as an Art Deco car hauler
> _______________________________________________
> GMCnet mailing list
> Unsubscribe or Change List Options:
> http://temp.gmcnet.org/cgi-bin/mailman/listinfo/gmclist
_______________________________________________
GMCnet mailing list
Unsubscribe or Change List Options:
http://temp.gmcnet.org/cgi-bin/mailman/listinfo/gmclist
Sully
77 Royale basket case.
Future motorhome land speed record holder(bucket list)
Seattle, Wa.
|
|
|
|
| Re: [GMCnet] Redoing the cabinets [message #235902 is a reply to message #235870] |
Sat, 11 January 2014 22:27 |
kerry pinkerton
Messages: 2565
Registered: July 2012
Location: Harvest, Al
Karma: 15
|
Senior Member |
|
|
| sgltrac wrote on Sat, 11 January 2014 19:10 |
What is your floor plan again Kerry?
|
it was a standard Eleganza II, rear twin, davo, captains chairs with flip up table. We're converting it to front twins with a table that pulls out from under the bed (like Kelvin's) and installing rear facing settees.
Kerry Pinkerton - North Alabama
Had 5 over the years. Currently have a '06 Fleetwood Discovery 39L
[Updated on: Sat, 11 January 2014 22:28] Report message to a moderator |
|
|
|
|
|
|
|
| Re: [GMCnet] Redoing the cabinets [message #235934 is a reply to message #235917] |
Sun, 12 January 2014 10:12 |
jhbridges
Messages: 8412
Registered: May 2011
Location: Braselton ga
Karma: -74
|
Senior Member |
|
|
Did you stopdrill the crach, or just clean it and seal it?
�
--johnny\
'76 23' transmode norris
________________________________
From: Emery Stora <emerystora@me.com>
To: "gmclist@temp.gmcnet.org" <gmclist@temp.gmcnet.org>
Sent: Sunday, January 12, 2014 5:58 AM
Subject: Re: [GMCnet] Redoing the cabinets
That is exactly what I found for leaks at the front behind the drivers seat right in front of the large window. It ruined the wallboard between that window and the small drivers sliding window. It took a long time to trace but I finally found it was a hairline crack about 2" long in the middle of the top roof where the front cap connects to the main roof.
As you said it was running down the center of the arched roof support and dripping down inside the wall about four feet from where the leak was.� I found it by removing the inside ceiling panel over the driver and the wall panel and slowing moving a flowing hose up the roof seam until water started to drip inside. The tiny crack wasn't really visible until I knew the exact location.
I fixed it by cleaning the seam with some naphtha and running masking down both sides of the whole seam, smoothing in some polyurethane sealant, and pulling the tape while the sealant was still uncured. That gave a very clean patch. After curing I painted the sealant to match the roof.
That has lasted about 8 years now without leaking.
Emery Stora
77 Kingsley
Frederick, CO
On Jan 11, 2014, at 10:04 PM, Peter Bailey <bugeye@internode.on.net> wrote:
>
>
> Kerry,
> I found most leaks in our coach were a result of water entering the rear cap at the top where it meets the roof and then running down the large extruded top side frames to exit anywhere there was no resistance, especially at the end where that extrusion meets the front cap directly behind the drivers and passenger seats. e roof. Hope this is of some help.
> Peter Bailey
> from Ozy (Aussie)
_______________________________________________
GMCnet mailing list
Unsubscribe or Change List Options:
http://temp.gmcnet.org/cgi-bin/mailman/listinfo/gmclist
_______________________________________________
GMCnet mailing list
Unsubscribe or Change List Options:
http://temp.gmcnet.org/cgi-bin/mailman/listinfo/gmclist
Foolish Carriage, 76 26' Eleganza(?) with beaucoup mods and add - ons.
Braselton, Ga.
I forgive them all, save those who hurt the dogs. They must answer to me in hell
|
|
|
|
| Re: [GMCnet] Redoing the cabinets [message #235938 is a reply to message #235934] |
Sun, 12 January 2014 11:03 |
Emery Stora
Messages: 959
Registered: January 2011
Karma: 4
|
Senior Member |
|
|
There was nothing to drill. All one could see was a hairline crack in the paint by the edge if the aluminum roof panel. It is likely that the seam was that way from the factory and the paint was all that was sealing it.
Emery Stora
On Jan 12, 2014, at 9:12 AM, Johnny Bridges <jhbridges@ymail.com> wrote:
> Did you stopdrill the crach, or just clean it and seal it?
>
> --johnny\
> '76 23' transmode norris
>
>
> ________________________________
> From: Emery Stora <emerystora@me.com>
> To: "gmclist@temp.gmcnet.org" <gmclist@temp.gmcnet.org>
> Sent: Sunday, January 12, 2014 5:58 AM
> Subject: Re: [GMCnet] Redoing the cabinets
>
>
> That is exactly what I found for leaks at the front behind the drivers seat right in front of the large window. It ruined the wallboard between that window and the small drivers sliding window. It took a long time to trace but I finally found it was a hairline crack about 2" long in the middle of the top roof where the front cap connects to the main roof.
>
> As you said it was running down the center of the arched roof support and dripping down inside the wall about four feet from where the leak was. I found it by removing the inside ceiling panel over the driver and the wall panel and slowing moving a flowing hose up the roof seam until water started to drip inside. The tiny crack wasn't really visible until I knew the exact location.
>
> I fixed it by cleaning the seam with some naphtha and running masking down both sides of the whole seam, smoothing in some polyurethane sealant, and pulling the tape while the sealant was still uncured. That gave a very clean patch. After curing I painted the sealant to match the roof.
>
> That has lasted about 8 years now without leaking.
>
> Emery Stora
> 77 Kingsley
> Frederick, CO
_______________________________________________
GMCnet mailing list
Unsubscribe or Change List Options:
http://temp.gmcnet.org/cgi-bin/mailman/listinfo/gmclist
|
|
|
|
| Re: [GMCnet] Redoing the cabinets [message #236049 is a reply to message #235938] |
Sun, 12 January 2014 23:30 |
sgltrac
Messages: 2797
Registered: April 2011
Karma: 1
|
Senior Member |
|
|
The cockpit windows leak everywhere. They leak between the frame and the coach and they leak between the glass and the rubber the glass sits in and they leak between the rubber the glass sits in and the frame.
Store it under cover. Water proof the wood floor or move to Arizona. And store it inside.
If yours doesn't you either have re sealed those windows correctly ( miraculously ) live in az or have not looked closely enough with your interior out while raining hard.
Todd Sullivan
Sully
77 royale
Seattle ( rainy )
> On Jan 12, 2014, at 9:03 AM, Emery Stora <emerystora@me.com> wrote:
>
> There was nothing to drill. All one could see was a hairline crack in the paint by the edge if the aluminum roof panel. It is likely that the seam was that way from the factory and the paint was all that was sealing it.
>
> Emery Stora
>
>> On Jan 12, 2014, at 9:12 AM, Johnny Bridges <jhbridges@ymail.com> wrote:
>>
>> Did you stopdrill the crach, or just clean it and seal it?
>>
>> --johnny\
>> '76 23' transmode norris
>>
>>
>> ________________________________
>> From: Emery Stora <emerystora@me.com>
>> To: "gmclist@temp.gmcnet.org" <gmclist@temp.gmcnet.org>
>> Sent: Sunday, January 12, 2014 5:58 AM
>> Subject: Re: [GMCnet] Redoing the cabinets
>>
>>
>> That is exactly what I found for leaks at the front behind the drivers seat right in front of the large window. It ruined the wallboard between that window and the small drivers sliding window. It took a long time to trace but I finally found it was a hairline crack about 2" long in the middle of the top roof where the front cap connects to the main roof.
>>
>> As you said it was running down the center of the arched roof support and dripping down inside the wall about four feet from where the leak was. I found it by removing the inside ceiling panel over the driver and the wall panel and slowing moving a flowing hose up the roof seam until water started to drip inside. The tiny crack wasn't really visible until I knew the exact location.
>>
>> I fixed it by cleaning the seam with some naphtha and running masking down both sides of the whole seam, smoothing in some polyurethane sealant, and pulling the tape while the sealant was still uncured. That gave a very clean patch. After curing I painted the sealant to match the roof.
>>
>> That has lasted about 8 years now without leaking.
>>
>> Emery Stora
>> 77 Kingsley
>> Frederick, CO
> _______________________________________________
> GMCnet mailing list
> Unsubscribe or Change List Options:
> http://temp.gmcnet.org/cgi-bin/mailman/listinfo/gmclist
_______________________________________________
GMCnet mailing list
Unsubscribe or Change List Options:
http://temp.gmcnet.org/cgi-bin/mailman/listinfo/gmclist
Sully
77 Royale basket case.
Future motorhome land speed record holder(bucket list)
Seattle, Wa.
|
|
|
|
Goto Forum:
Current Time: Sat Feb 01 12:43:18 CST 2025
Total time taken to generate the page: 0.07039 seconds
|
 GMCforum
