Home » Public Forums » GMCnet » My 1976 Palm Beach Project
( ) 2 Votes ) 2 Votes
| Re: [GMCnet] My 1976 Palm Beach Project [message #298875 is a reply to message #298825] |
Mon, 11 April 2016 13:54   |
 Justin Brady

Messages: 769
Registered: April 2015
Location: Bell Buckle, TN
Karma: 11
|
Senior Member |
|
|
I've been doing a little more research on the propane and batteries in the same compartment.
From what I can tell there is no evidence that it's a problem other than the plethora of people on the internet saying "that's a bad idea" (of which there are many, but no one with any evidence or any real science)
Propane is almost double the molar mass of air, and any leak will flow downward and out of the compartment. Batteries being overcharged will produce flammable hydrogen gas, but propane is a saturated hydrocarbon and will not react with hydrogen in any meaningful way. The hydrogen itself is much more of a concern than the propane (2.1 to 10.1% concentration of propane in air required for combustion) 4% to 75% for Hydrogen.
I believe you're more likely to accidentally ignite your gas tanks with a spark at the pump than you are to have an issue here. I'd say there's a slight risk increase from the fact that there are now (potentially) 2 sources of fuel in the compartment, but the likelihood of either of them being an issue is slim at best.
I do however think it is important to heed the wisdom of others, so I will likely build a wall that will seal against the propane door with weatherstripping when closed. This will create separate compartments for the batteries and propane. It's probably a 30 minute job and won't hurt anything. Stay tuned for photos.
Justin Brady
http://www.thegmcrv.com/
1976 Palm Beach 455
|
|
|
|
|
|
| Re: My 1976 Palm Beach Project [message #300483 is a reply to message #298877] |
Thu, 12 May 2016 08:27 |
Justin Brady
Messages: 769
Registered: April 2015
Location: Bell Buckle, TN
Karma: 11
|
Senior Member |
|
|
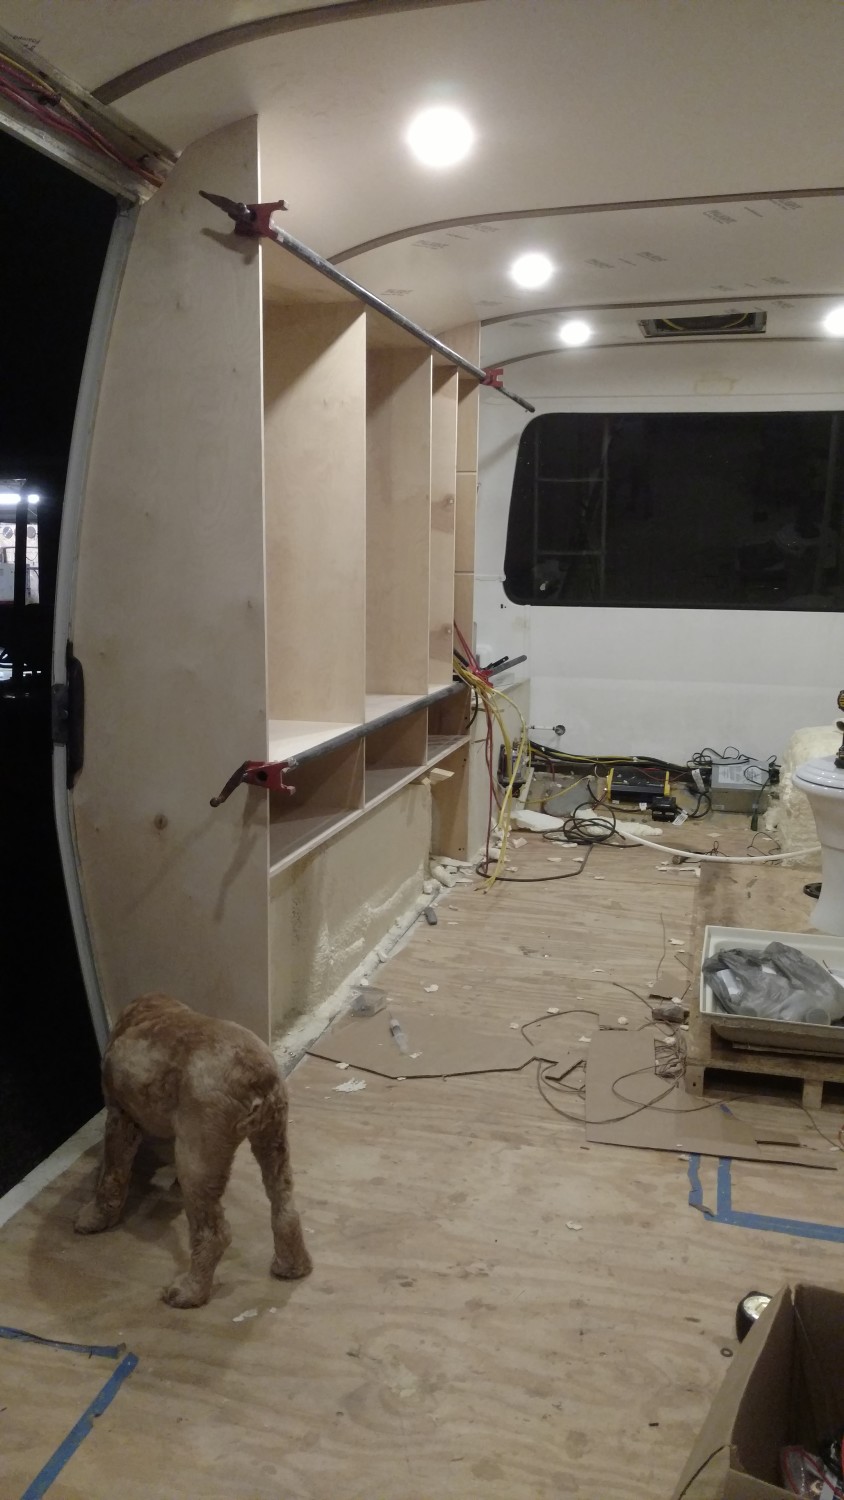
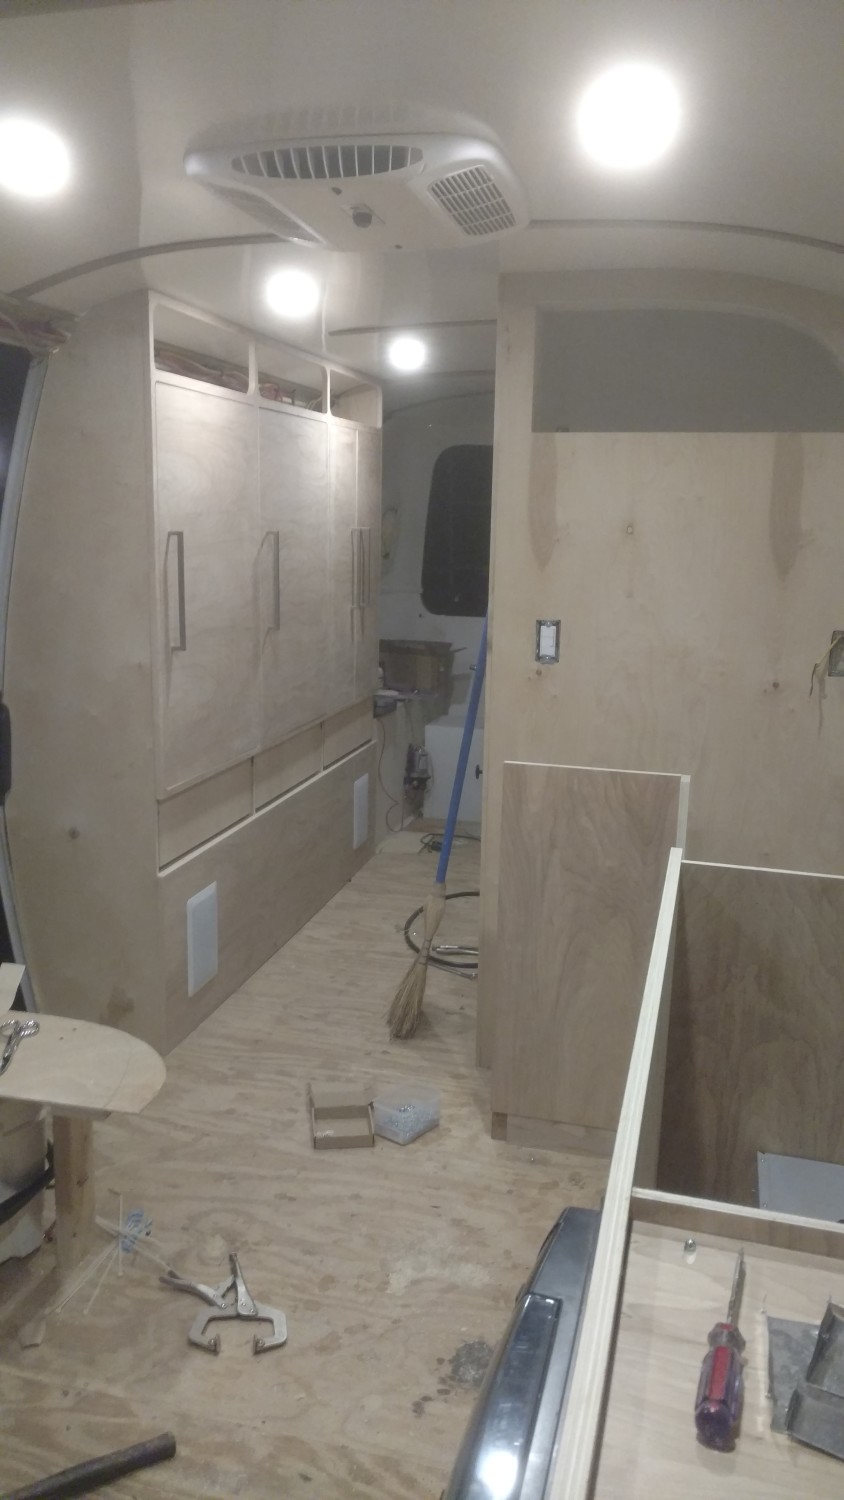
A good bit of progress made here.
We got the ceiling in and the LED lights in.
The ceiling I decided to go with 1/8" foamed PVC panels with no paint or upholstery. Waterproof, paintable, durable. They look great. The overlaps will be covered by walnut trim strips (they are in, just need to be finish sanded and cleared).
One of the things that I was most disappointed in the stock GMC was the lighting. Something about it just felt off. From the weird rectangle things under the upper cabinets to the undercabinets that reminded me of an emergency exit path on a plane, I just didn't dig it. Add that to the lack of decent overhead lighting and we've got a recipe for a change!
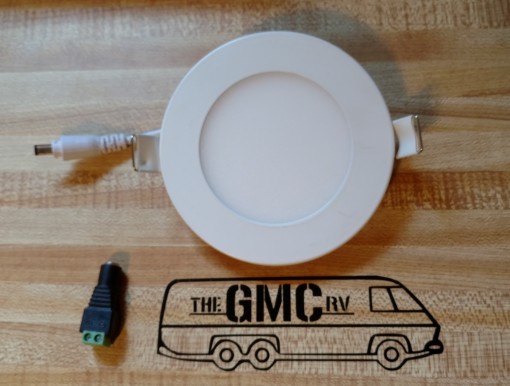
So what to do? Very early on in this process I started looking for lighting. I knew what I wanted It was just hard to find. When I finally came across it it was pricey, but perfect. While searching on Amazon I found 4W LED Panel Lights, the size was right (4.5″ wide, 1/2″ thick and flush mount) and they looked awesome. At 10 bucks a piece they weren't cheap, but not too high either so I ordered a few.
The lights came in and the look, fit and feel was great! But the color was off. The ones I found had a 6500 Kelvin color temperature (which in laymen terms means they are that horrific surgical blue that all the assholes in civics put in their headlights to feel cool). At this point I contacted some of my sources in the Peoples Republic of China and found out who the best manufacturer of LED's over there is. I contacted them and sure enough they make the amazon lights. We chatted a bit and I told them I wanted 3000 Kelvin color temp and they agreed and made up some samples and sent them over.
What a difference! 3000K in my opinion is perfect, they feel just right. Nice warm white-ish yellow light very similar to what you're used to from an incandescent.
So I placed an order, minimum quantity put me in the LED business and we've been selling them ever since to many happy customers. (They are available in the store)
After getting our ceiling up (that will be a different post when it's finished) We tackled the lighting install which is a very simple task with these LED's.
They come with a 5.5mm x 2.1mm male plug as seen in the photo above. You can either cut this off and wire as you normally would (red to + black to -) or you can use an adapter to make them removable (also in the picture). We went with adapters because, well you never know. If one bites the dust its a simple 1 minute job to replace it this way. If using the screw on terminals the best way I have found is to strip your wires about 3/16 of an inch and twist the strands together. Unscrew the screw and push the wire into the appropriate slot (labeled) and screw it down tight. I recommend putting heat shrink over the whole shebang once you're finished for a nice clean install.
We used a hole saw (3 5/8″) to drill the holes for the lights. Our wiring was run before we did the spray foam so it's just hanging from the ceiling. Pop the lights in the holes and whalla! Let there be light. During the day time we were not sure how it was going to work out, they didn't look very bright so we thought maybe we would need to add more. When we came out after dark we were very pleasantly surprised! We have 8 lights installed (2 more to go in the bathroom when the walls are up) and the brightness is perfect. Not so bright to run you out, but plenty bright to work or make dinner or just relax. We are so pleased with the outcome!
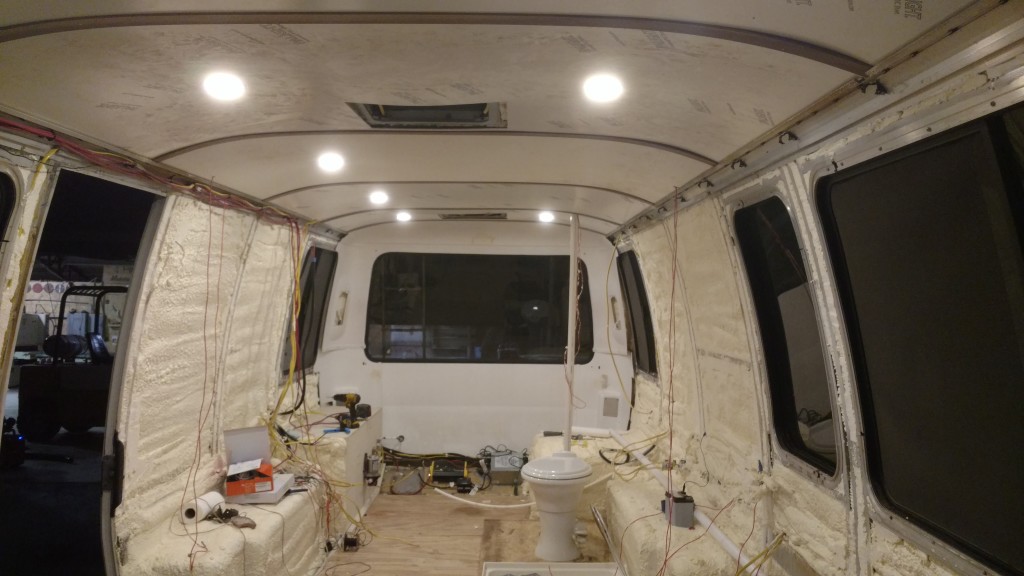
These photos haven't been altered at all that's exactly what it looks like in the coach. There's not quite as much glare in person but hey it's a cell phone camera.
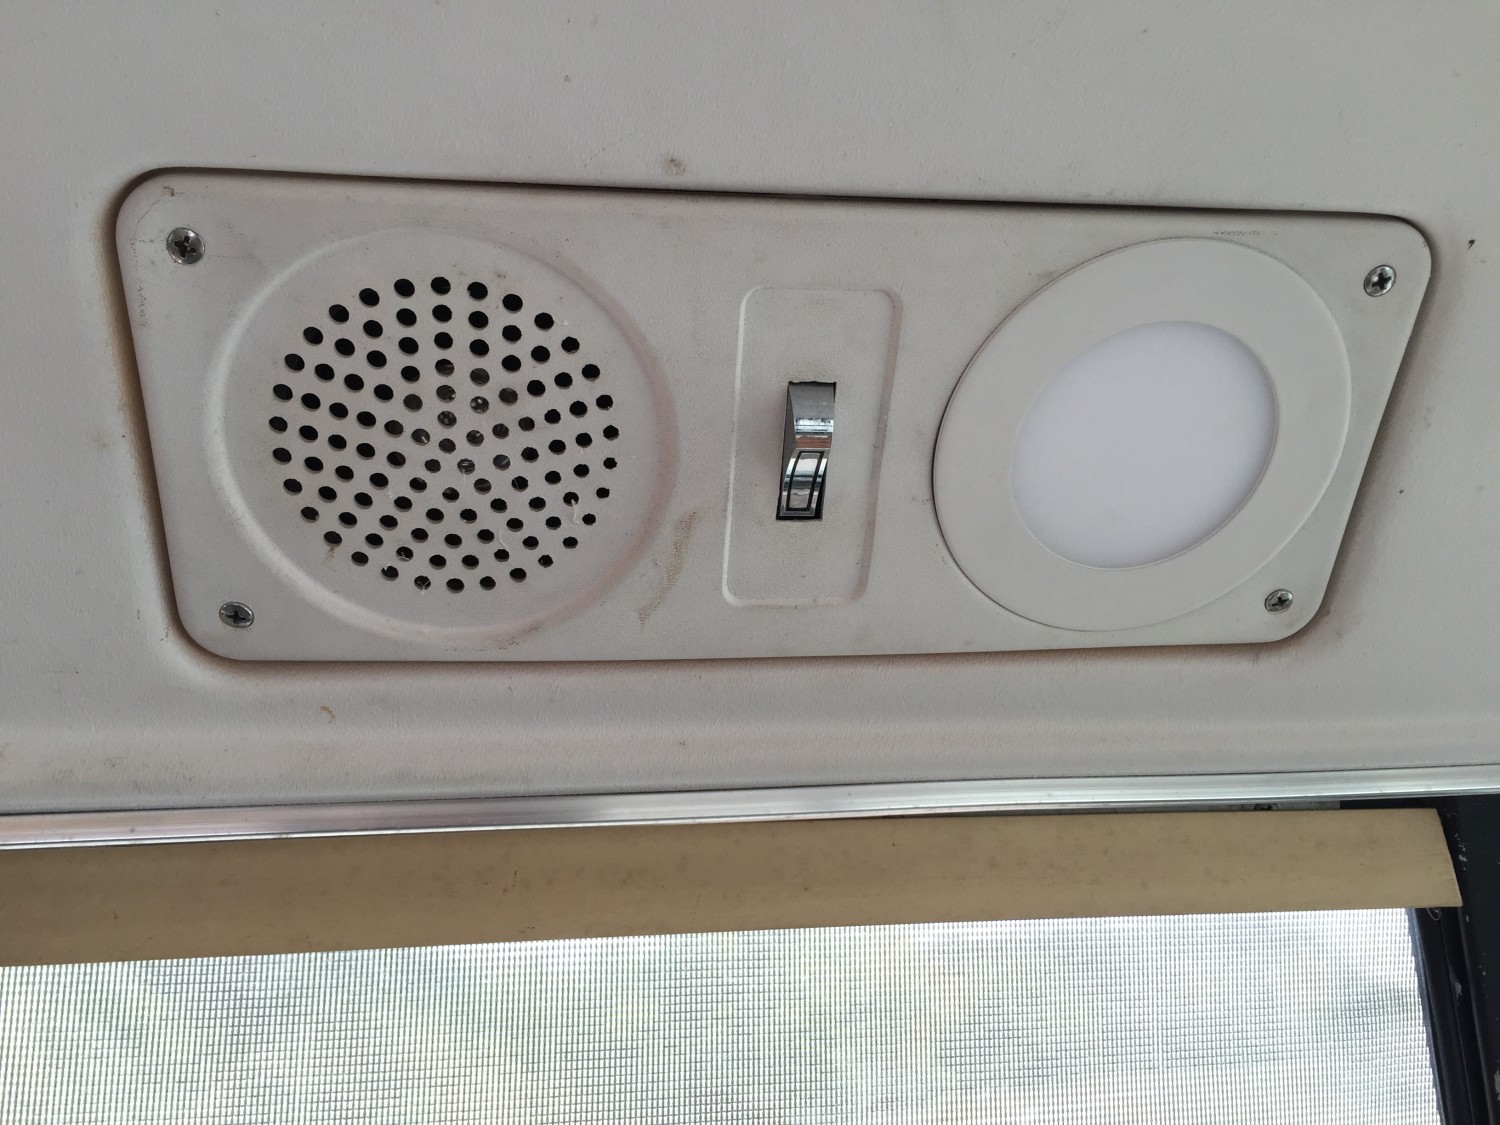
They also adapt perfectly to those ugly bulbous stock lights in the driver area:
Now on to the really awesome part!
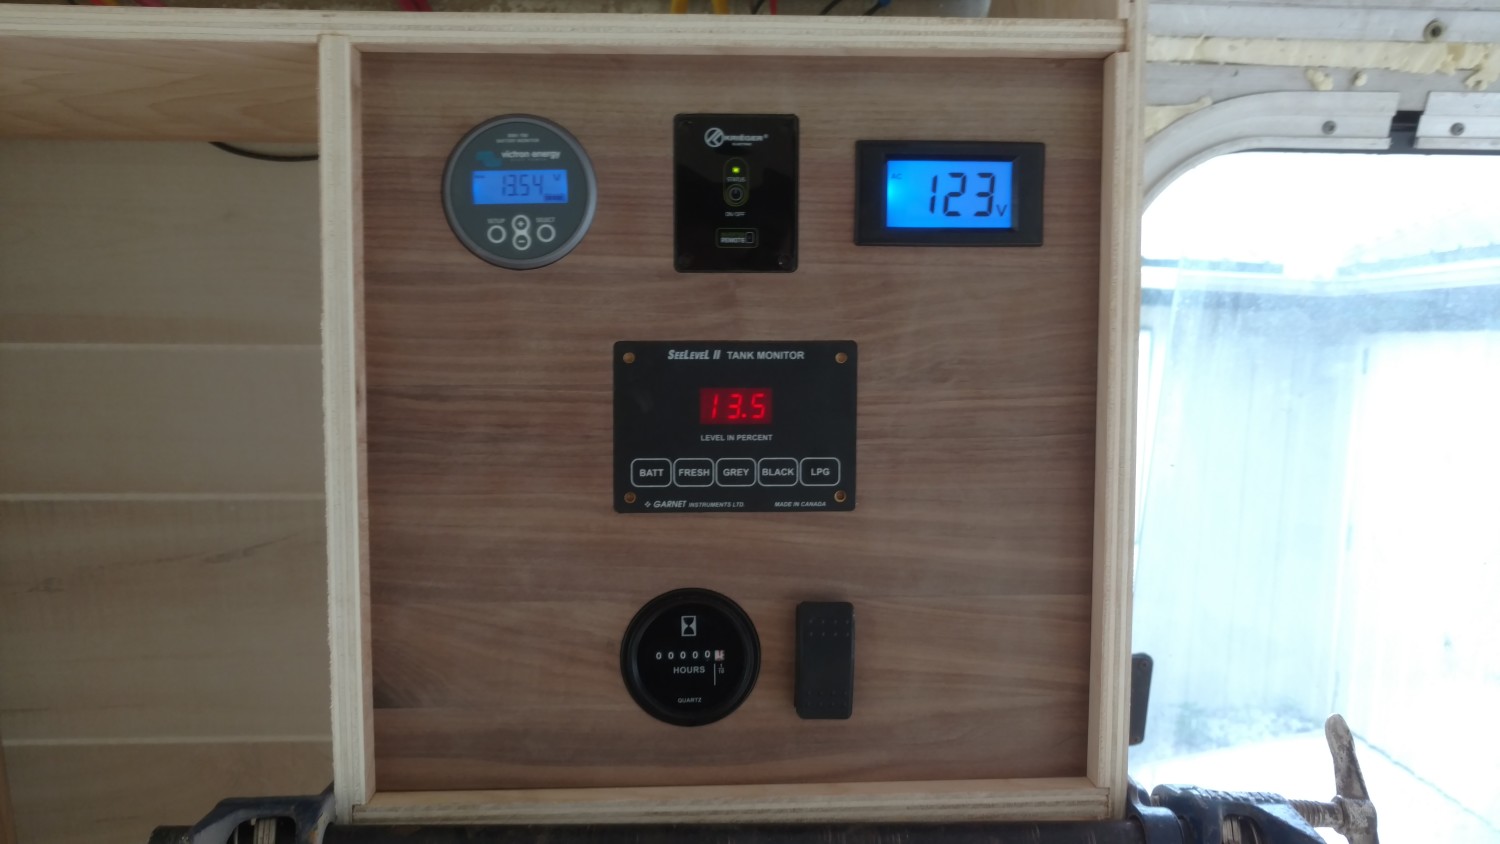
I hooked up the Victron Battery Monitor to see how we were doing on amp draw. One of the biggest upsides to converting to LED is the tiny power requirement for the amount of light coming out. We have a total of 8 lights on when these photos were taken.
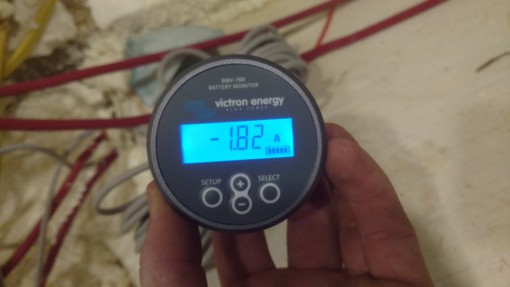
So the whole coach is lit up like an airport and we're pulling a whopping 1.82 amps. That's .2275 amps per light. Realistically we will never have more than 4 on at a time so our normal amp draw will be .91 amps or 11.5 Watts, or in laymens terms, nearly nothing.
For comparison the standard 1156 automotive bulb that your GMC has now is 21 watts.....each.......so this whole lighting system draws the same as if you have one of the tiny little lights on in your coach.
According to the battery monitor (which hasn't been calibrated yet so I'm sure it's wrong) we will get 90 hours of light at full blast before we drain the batteries to 50%. Not bad. Not bad at all.
Justin Brady
http://www.thegmcrv.com/
1976 Palm Beach 455
[Updated on: Thu, 12 May 2016 10:04] Report message to a moderator |
|
|
|
|
|
|
|
|
|
|
|
|
|
| Re: [GMCnet] My 1976 Palm Beach Project [message #301026 is a reply to message #301022] |
Mon, 23 May 2016 10:09 |
Handyman

Messages: 229
Registered: April 2016
Location: The Netherlands
Karma: 2
|
Senior Member |
|
|
Very nice job, Justin!
You're MH will become a real nice piece of (wood)art 
Daniel
Daniel Jacobs, NL-USA 1977 GMC Eleganza II, Rebuild 455 (2019) 3.55 FD. FiTech and (Modified) FCC, Electric Pump, insulated GasTanks, 100A Alternator, APC, McDash, Schräder Valves + extern Fills, Ceramic Film, TPMS, FlexSteel Seats
|
|
|
|
| Re: My 1976 Palm Beach Project [message #301041 is a reply to message #281079] |
Mon, 23 May 2016 15:28 |
jhbridges
Messages: 8412
Registered: May 2011
Location: Braselton ga
Karma: -74
|
Senior Member |
|
|
Alls you need now are a couple of open cartons with IKEA on them.
--johnny
Foolish Carriage, 76 26' Eleganza(?) with beaucoup mods and add - ons.
Braselton, Ga.
I forgive them all, save those who hurt the dogs. They must answer to me in hell
|
|
|
|
| Re: My 1976 Palm Beach Project [message #305519 is a reply to message #281079] |
Wed, 17 August 2016 10:32 |
Handyman
Messages: 229
Registered: April 2016
Location: The Netherlands
Karma: 2
|
Senior Member |
|
|
Hi Justin,
I am, and I think others with me, are very curious about your further progress of your exceptional nice transformation of your GMC MH...
Daniel
Daniel Jacobs, NL-USA 1977 GMC Eleganza II, Rebuild 455 (2019) 3.55 FD. FiTech and (Modified) FCC, Electric Pump, insulated GasTanks, 100A Alternator, APC, McDash, Schräder Valves + extern Fills, Ceramic Film, TPMS, FlexSteel Seats
|
|
|
|
|
|
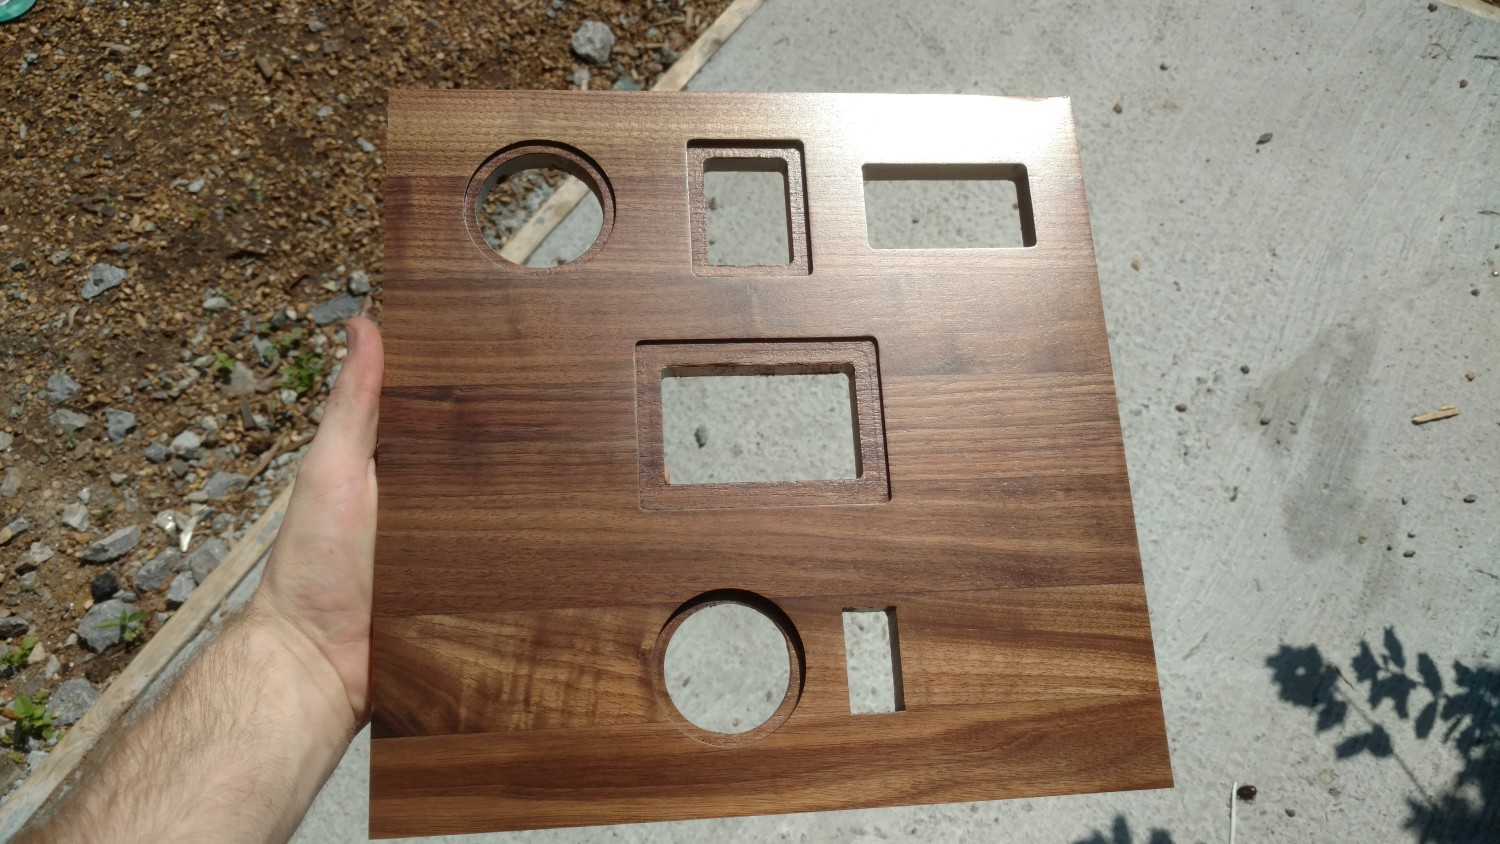
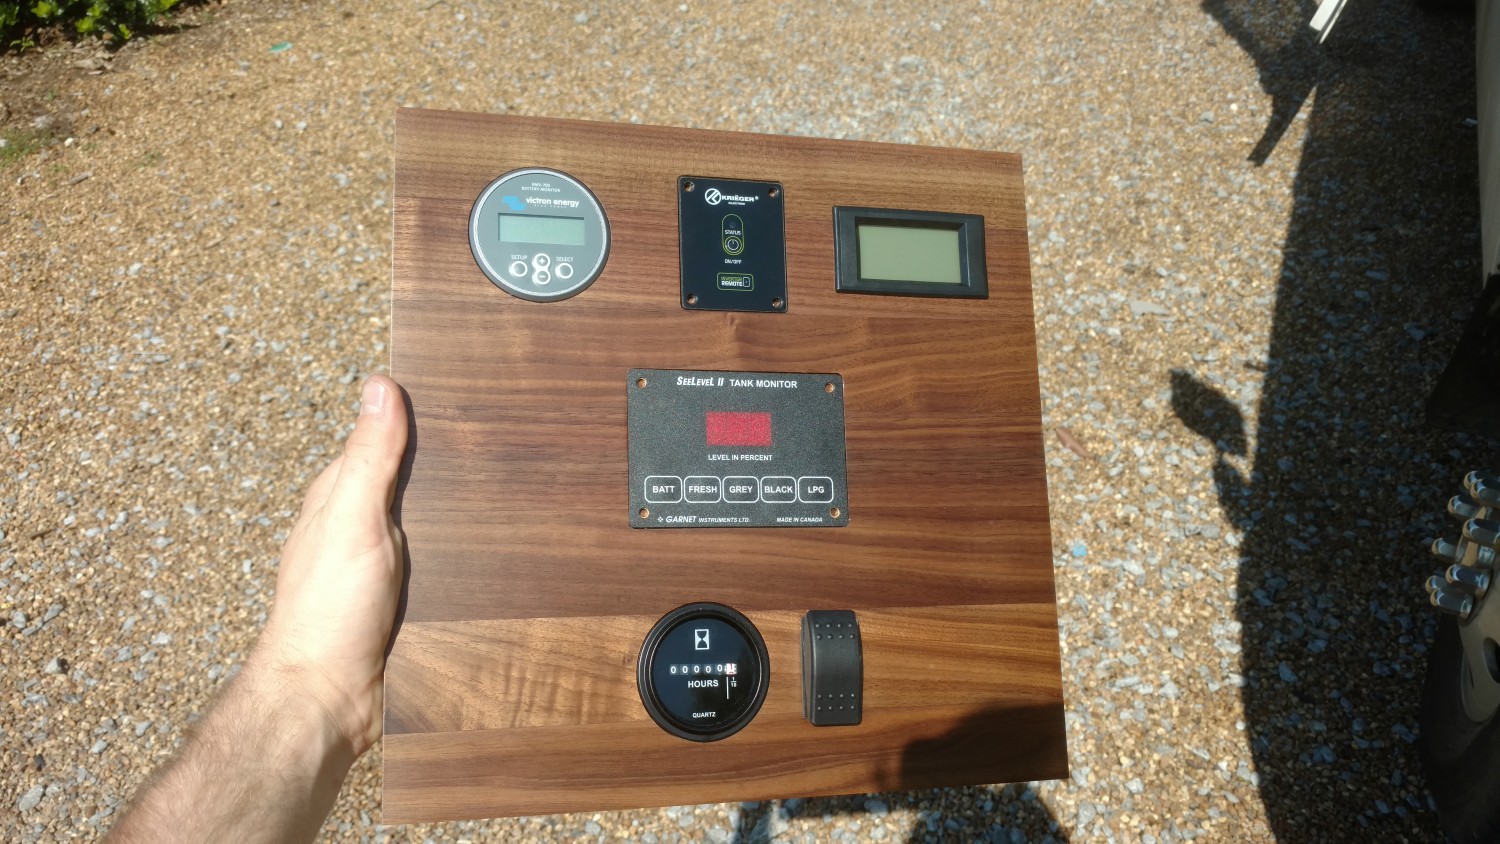
| Re: [GMCnet] My 1976 Palm Beach Project [message #306132 is a reply to message #301021] |
Mon, 29 August 2016 17:51 |
Olly Schmidt
Messages: 1265
Registered: February 2014
Location: Germany and Scottsville, ...
Karma: 8
|
Senior Member |
|
|
Hello Justin,
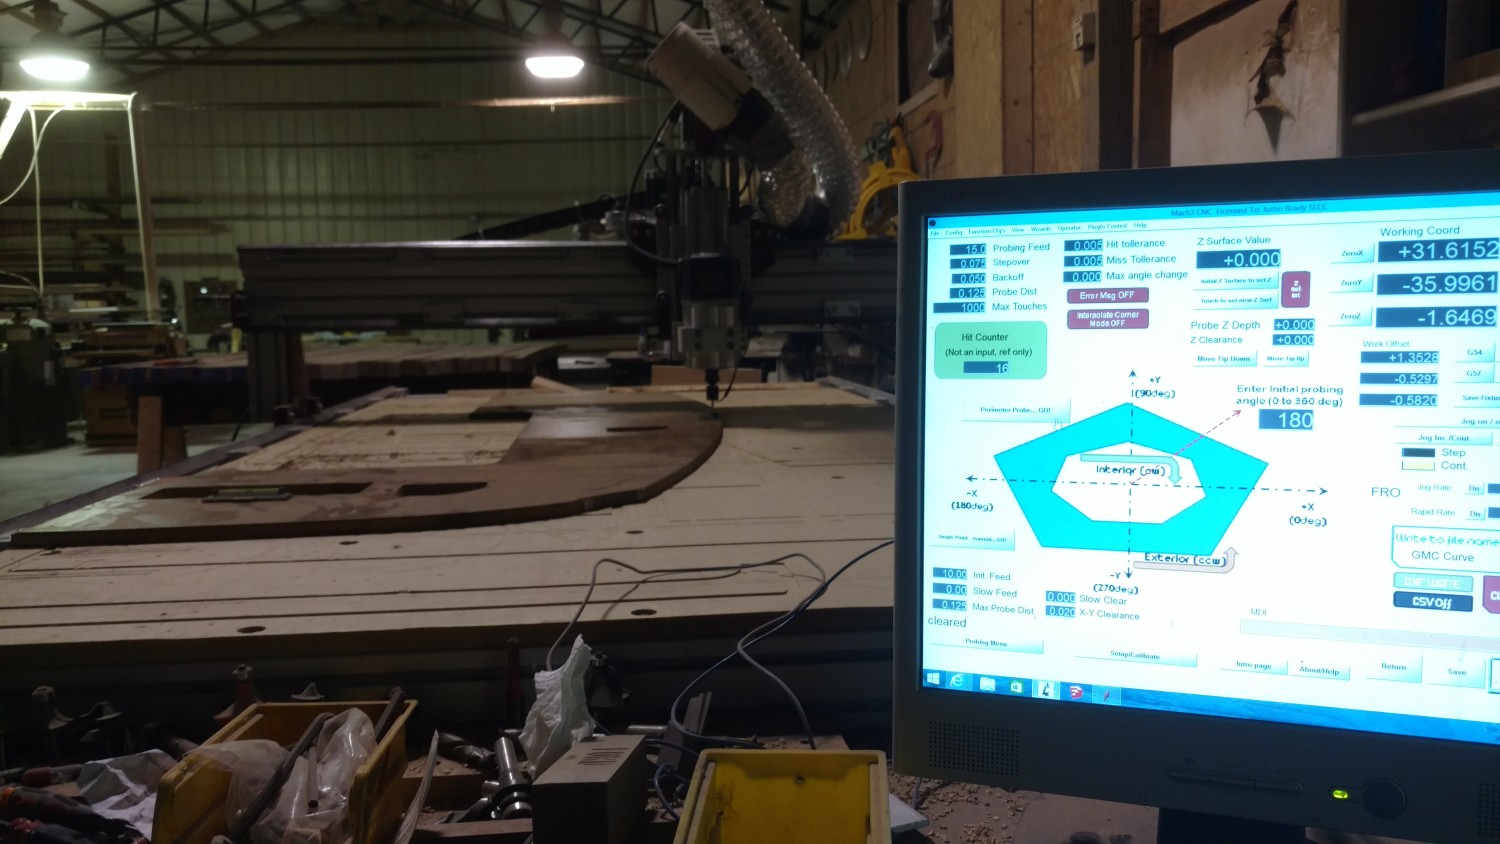
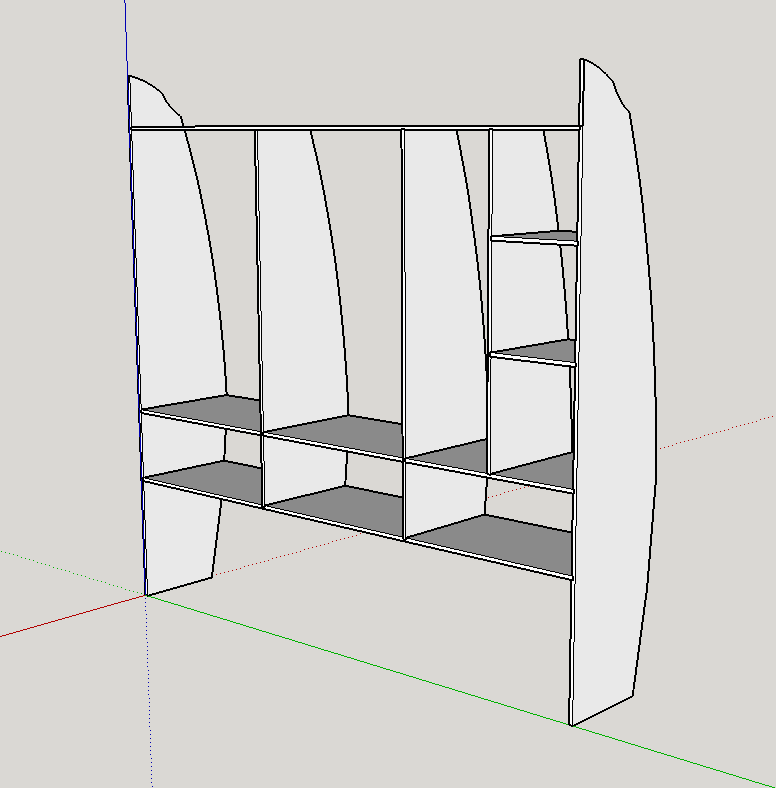
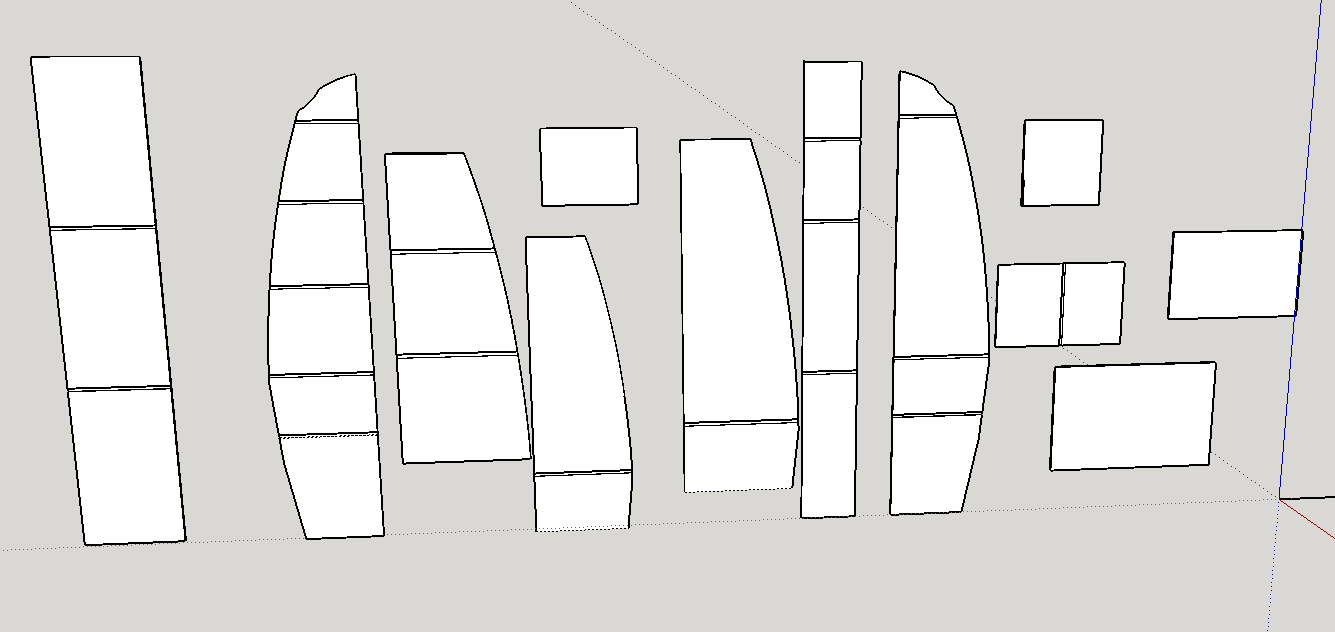
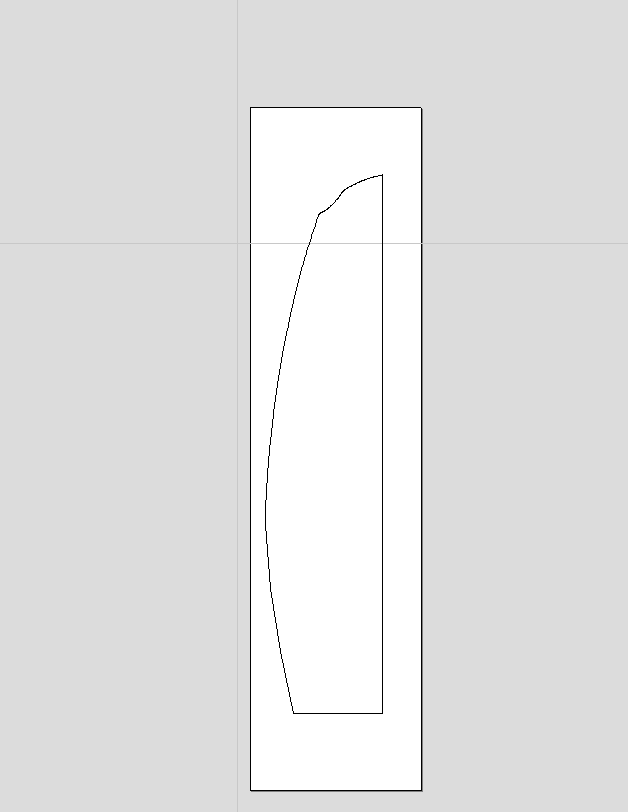
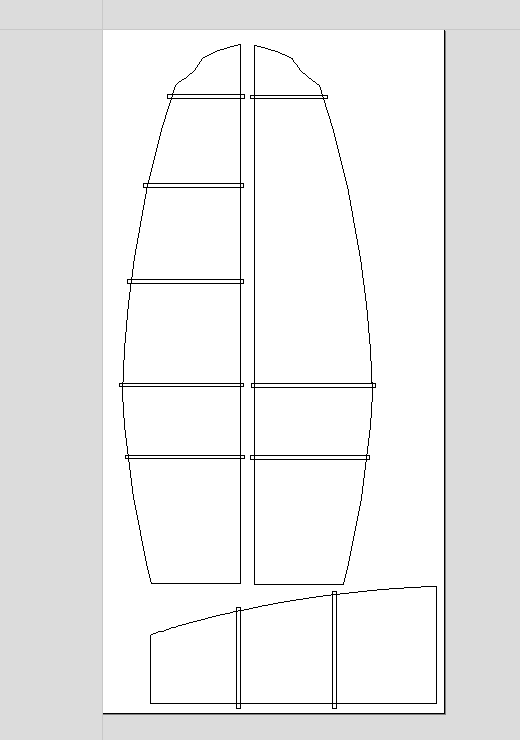
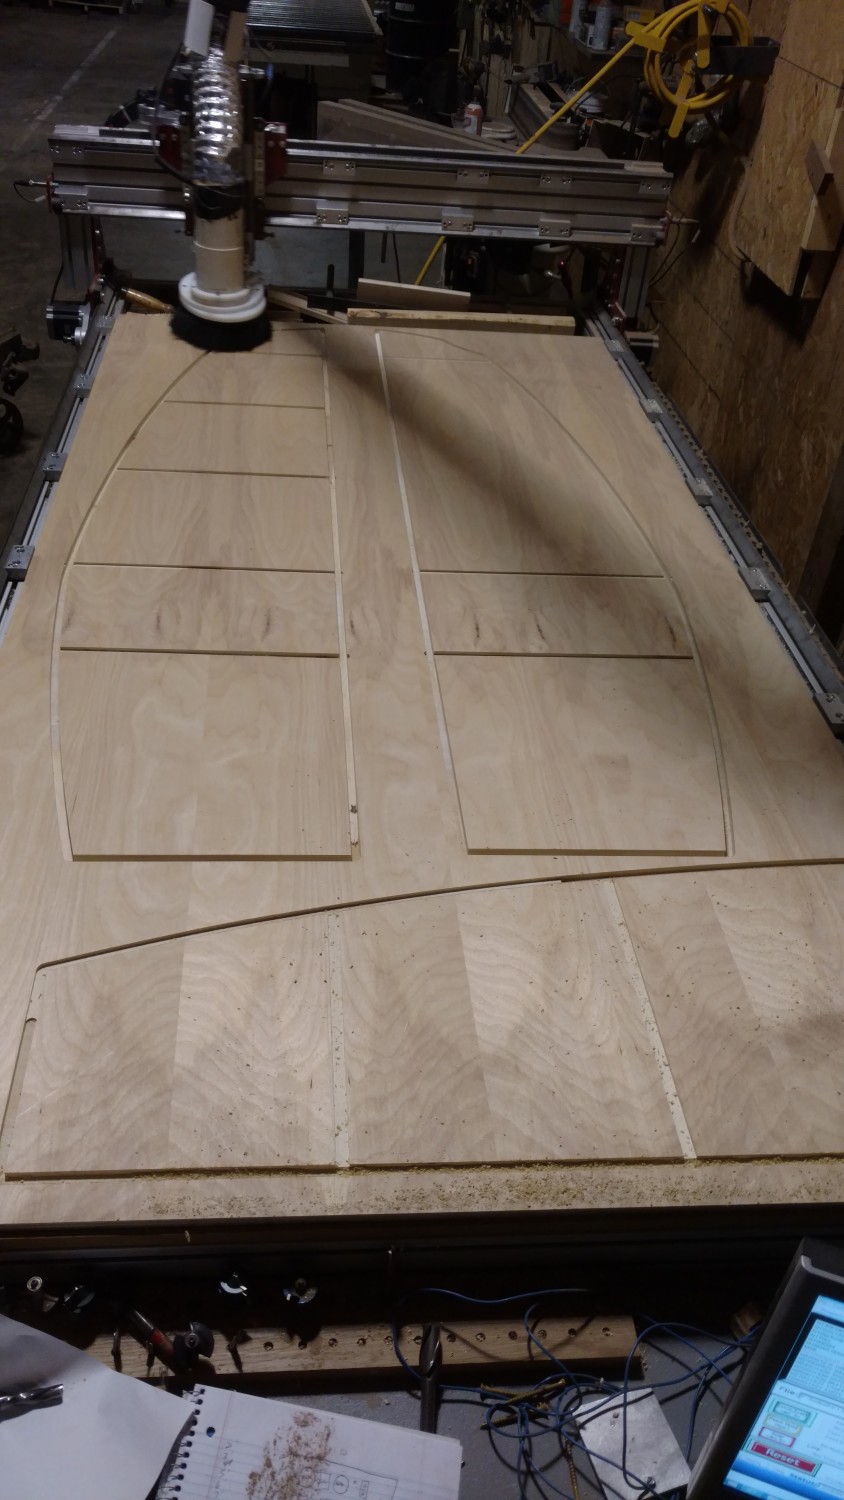
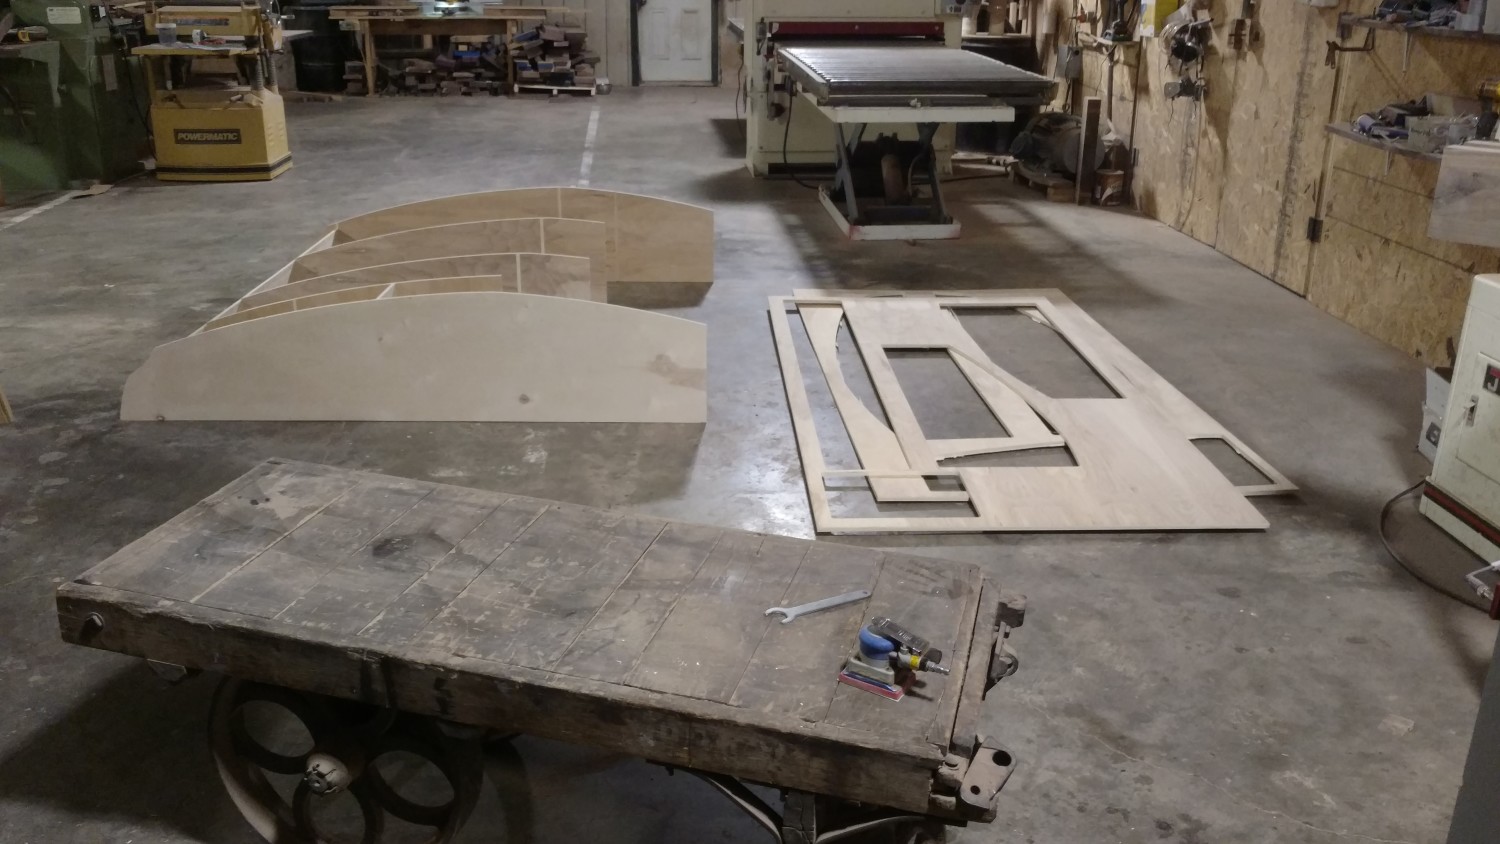
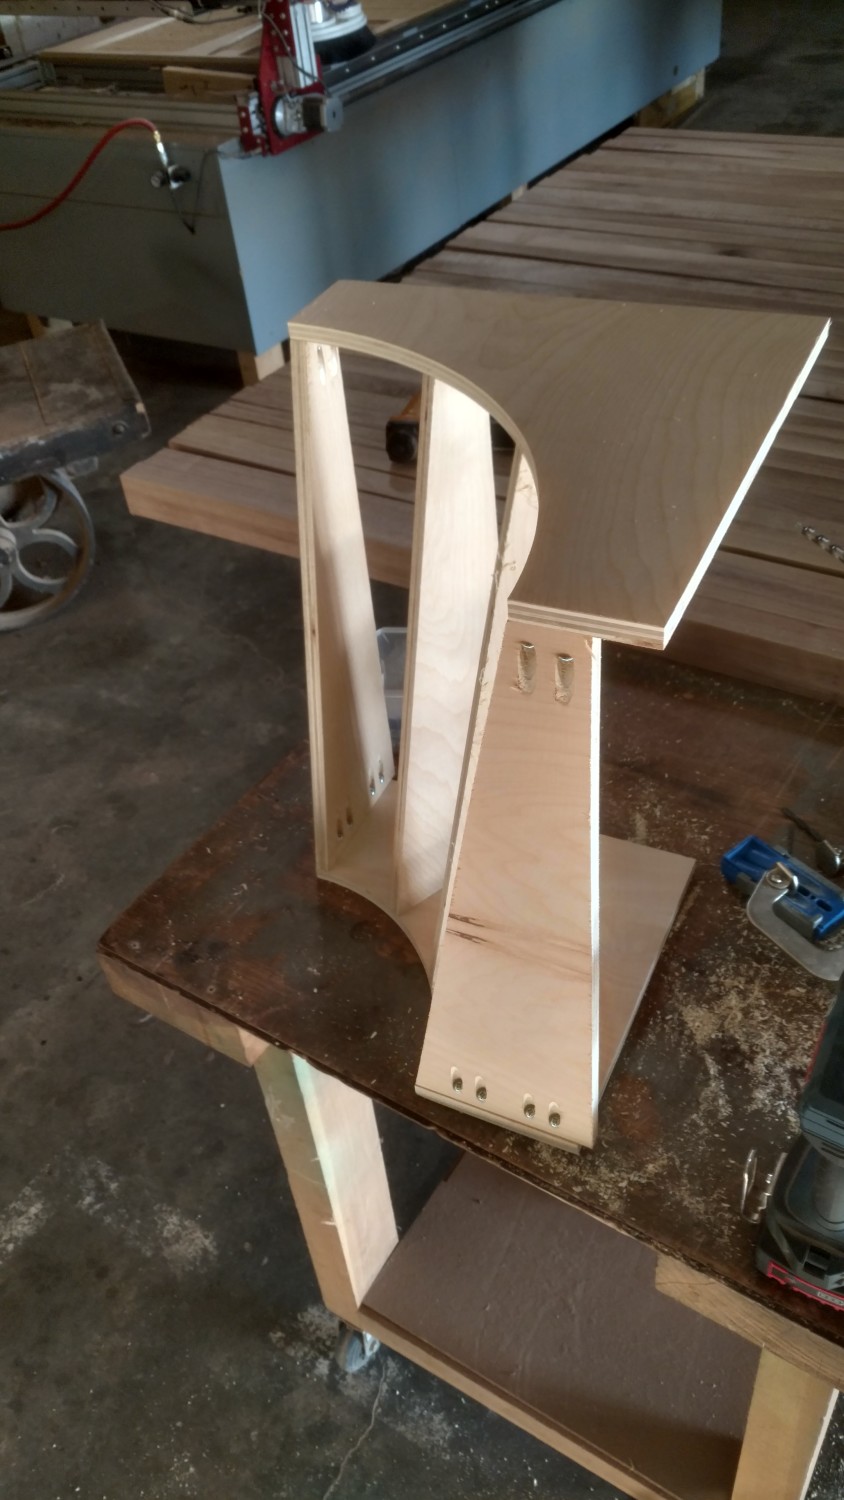
you don't happen to have a copy of the CNC files for the cabinets, do
Best regards
Olly Schmidt
PGP Key ID: 0x18a9 3a1f 4196 bf22
'76a Eleganza II, VA
'73 Sequoia, SH, Germany
|
|
|
|
|
|
|
|
| Re: My 1976 Palm Beach Project [message #309135 is a reply to message #281079] |
Fri, 21 October 2016 05:24 |
Handyman
Messages: 229
Registered: April 2016
Location: The Netherlands
Karma: 2
|
Senior Member |
|
|
Justin, absolutly Wonderfull !!!
If you were not living in Tennessee, but here in the neighbourhood .... your address and phonenumber would be on top of my list for the craftsmen to call and do a excellent job !!
Thanks for sharing this with us.
Daniel
Daniel Jacobs, NL-USA 1977 GMC Eleganza II, Rebuild 455 (2019) 3.55 FD. FiTech and (Modified) FCC, Electric Pump, insulated GasTanks, 100A Alternator, APC, McDash, Schräder Valves + extern Fills, Ceramic Film, TPMS, FlexSteel Seats
[Updated on: Fri, 21 October 2016 05:26] Report message to a moderator |
|
|
|
| Re: [GMCnet] My 1976 Palm Beach Project [message #309137 is a reply to message #309135] |
Fri, 21 October 2016 07:27 |
Kingsley Coach
Messages: 2691
Registered: March 2009
Location: Nova Scotia Canada
Karma: -34
|
Senior Member |
|
|
Kooks good !
Do you have a floor plan...or did I miss that?
Tks
Mike in NS
On Fri, Oct 21, 2016 at 7:24 AM, Daniel Jacobs wrote:
> Justin, absolutly Wonderfull !!!
> If you were not living in Georgia, but here in the neighbourhood .... your
> address and phonenumber would be on top of my list for the craftsmen to
> call and do a excellent job !!
>
> Thanks for sharing this with us.
>
> Daniel
> --
> Daniel Jacobs, No GMC, but an admirer of them .... We'll see what the
> future brings ....
>
> Always remember, the world is full of nice people!
> So, if you can't find one, be one!
>
> _______________________________________________
> GMCnet mailing list
> Unsubscribe or Change List Options:
> http://list.gmcnet.org/mailman/listinfo/gmclist_list.gmcnet.org
>
--
Michael Beaton
1977 Kingsley 26-11
1977 Eleganza II 26-3
Antigonish, NS
Life is too short to hold a grudge; slash some tires and call it even !
_______________________________________________
GMCnet mailing list
Unsubscribe or Change List Options:
http://list.gmcnet.org/mailman/listinfo/gmclist_list.gmcnet.org
|
|
|
|
|
|
|
|
|
|
Goto Forum:
Current Time: Thu Apr 25 00:54:00 CDT 2024
Total time taken to generate the page: 0.18902 seconds
|
 GMCforum