|
|
| Re: [GMCnet] My 1976 Palm Beach Project [message #298379 is a reply to message #298377] |
Thu, 31 March 2016 08:15   |
 RicksGMC

Messages: 145
Registered: May 2012
Karma: 0
|
Senior Member |
|
|
I blow out the lines with air, then bypass the water heater and pump antifreeze thru the lines and pour some in each drain trap. It may be overkill but I've never had a problem.
Rick
Rick&Tammy Drummond
Prior Lake MN
'74 (re)Painted Desert
> On Mar 31, 2016, at 8:07 AM, Justin Brady wrote:
>
> Quick question.
> Anyone have any genius ideas for easy winterizing?
> Since I am redoing all the plumbing I can do whatever I'd like.
>
> I cant seem to decide whether to just blow it out or use antifreeeze.
> Any insight?
>
>
> --
> Justin Brady
> 1976 Palm Beach 455
>
> _______________________________________________
> GMCnet mailing list
> Unsubscribe or Change List Options:
> http://list.gmcnet.org/mailman/listinfo/gmclist_list.gmcnet.org
_______________________________________________
GMCnet mailing list
Unsubscribe or Change List Options:
http://list.gmcnet.org/mailman/listinfo/gmclist_list.gmcnet.org
Rick
Rick&Tammy Drummond
Prior Lake MN
'74 (re)Painted Desert
|
|
|
|
| Re: [GMCnet] My 1976 Palm Beach Project [message #298385 is a reply to message #298330] |
Thu, 31 March 2016 09:36 |
Glover, Brian K.
Messages: 87
Registered: October 2015
Location: Griffin Georgia
Karma: 0
|
Member |
|
|
Justin,
On the black tank removal ? mine looks to be leaking and was wondering how big a deal it was to remove / drop ?
-----Original Message-----
From: Gmclist [mailto:gmclist-bounces@list.gmcnet.org] On Behalf Of Justin Brady
Sent: Wednesday, March 30, 2016 11:26 AM
To: gmclist@list.gmcnet.org
Subject: Re: [GMCnet] My 1976 Palm Beach Project
A little more progress made lately.
I got the black tank repaired and installed a few days ago.
Got the last of the 12V wiring done in the battery compartment.
Went with a lot of marine stuff intended for boats.
Got a Morningstar 25A solar controller, a Blue Sea ACR (combiner), a battery cutoff switch and a distribution block to clean up the wiring.
http://s67.photobucket.com/user/jbrady2/media/GMC/IMG_20160323_180019520_zpstvtsoskd.jpg.html
From the distribution block the 4 wires run to: Generator, inverter, converter/DC panel, and input from solar.
We are going to start with 215ah of battery (2 6v duracell gc2's) and see where that takes us. I have room for 2 more in the propane/battery
compartment and could also fit 2 more int eh generator compartment if needed.
http://s67.photobucket.com/user/jbrady2/media/GMC/IMG_20160329_133230820_zpst9i0s9mj.jpg.html
Once the batteries were in I had to weld an extension to the exhaust for the EV6010
http://s67.photobucket.com/user/jbrady2/media/GMC/IMG_20160322_171916397_zps8depooll.jpg.html
Got it installed and she cranked right up after I lowered the rear of the coach (pretty low on fuel at the moment). It's pretty loud inside the coach,
but there's no insulation or anything yet so I'm hopeful that it will tone down once it's all finished up. I'l definitely be adding insulation to the
gen compartment to try and tone it down a bit. I still need to extend the exhaust out from below the coach past the rear bumper.
Next up is insulation. So as soon as I get a free day I'll be experimenting with this spray foam stuff and will report back with how it works.
--
Justin Brady
1976 Palm Beach 455
_______________________________________________
GMCnet mailing list
Unsubscribe or Change List Options:
http://list.gmcnet.org/mailman/listinfo/gmclist_list.gmcnet.org
_______________________________________________
GMCnet mailing list
Unsubscribe or Change List Options:
http://list.gmcnet.org/mailman/listinfo/gmclist_list.gmcnet.org
Brian G.
Griffin Ga.
1978 Eleganza II
TZE168V101637
|
|
|
|
|
|
| Re: [GMCnet] My 1976 Palm Beach Project [message #298390 is a reply to message #298385] |
Thu, 31 March 2016 10:18 |
Justin Brady
Messages: 769
Registered: April 2015
Location: Bell Buckle, TN
Karma: 11
|
Senior Member |
|
|
Brian,
It's not bad. 4 bolts to drop it on mine, and then the finagling to get the pipes disconnected and the constant wonder whether when you remove the piped you're going to get a surprise shower.
You will have to disconnect the plumbing up top as well as the pipes are screwed in if I remember correctly.
Glover, Brian K. wrote on Thu, 31 March 2016 09:36Justin,
On the black tank removal ? mine looks to be leaking and was wondering how big a deal it was to remove / drop ?
-----Original Message-----
From: Gmclist [mailto:gmclist-bounces@list.gmcnet.org] On Behalf Of Justin Brady
Sent: Wednesday, March 30, 2016 11:26 AM
To: gmclist@list.gmcnet.org
Subject: Re: [GMCnet] My 1976 Palm Beach Project
A little more progress made lately.
I got the black tank repaired and installed a few days ago.
Got the last of the 12V wiring done in the battery compartment.
Went with a lot of marine stuff intended for boats.
Got a Morningstar 25A solar controller, a Blue Sea ACR (combiner), a battery cutoff switch and a distribution block to clean up the wiring.
http://s67.photobucket.com/user/jbrady2/media/GMC/IMG_20160323_180019520_zpstvtsoskd.jpg.html
From the distribution block the 4 wires run to: Generator, inverter, converter/DC panel, and input from solar.
We are going to start with 215ah of battery (2 6v duracell gc2's) and see where that takes us. I have room for 2 more in the propane/battery
compartment and could also fit 2 more int eh generator compartment if needed.
http://s67.photobucket.com/user/jbrady2/media/GMC/IMG_20160329_133230820_zpst9i0s9mj.jpg.html
Once the batteries were in I had to weld an extension to the exhaust for the EV6010
http://s67.photobucket.com/user/jbrady2/media/GMC/IMG_20160322_171916397_zps8depooll.jpg.html
Got it installed and she cranked right up after I lowered the rear of the coach (pretty low on fuel at the moment). It's pretty loud inside the coach,
but there's no insulation or anything yet so I'm hopeful that it will tone down once it's all finished up. I'l definitely be adding insulation to the
gen compartment to try and tone it down a bit. I still need to extend the exhaust out from below the coach past the rear bumper.
Next up is insulation. So as soon as I get a free day I'll be experimenting with this spray foam stuff and will report back with how it works.
--
Justin Brady
1976 Palm Beach 455
_______________________________________________
GMCnet mailing list
Unsubscribe or Change List Options:
http://list.gmcnet.org/mailman/listinfo/gmclist_list.gmcnet.org
_______________________________________________
GMCnet mailing list
Unsubscribe or Change List Options:
http://list.gmcnet.org/mailman/listinfo/gmclist_list.gmcnet.org
Justin Brady
http://www.thegmcrv.com/
1976 Palm Beach 455
|
|
|
|
|
|
| Re: [GMCnet] My 1976 Palm Beach Project [message #298513 is a reply to message #298391] |
Sat, 02 April 2016 18:47 |
Justin Brady
Messages: 769
Registered: April 2015
Location: Bell Buckle, TN
Karma: 11
|
Senior Member |
|
|
Big milestone today. The foam is in!
For all those following along at home, the 600bdft kit from Touch-N-Seal is more than enough to do the whole GMC.
I was able to get full 1.5" thickness on walls and ceilings. a 3" thick layer on the generator compartment, and still have a substantial amount in the cans by the end of it I was just walking around trying to find things to spray since I have no other use for it.
The hardest part of the whole process was removing the old foam, which is an absolute nightmare. If I were to do it over again I would buy a 200 bdft kit and spray it directly over the old foam.
The guns sprays well and is fairly easy to use, it takes a little learning but not too bad at all.
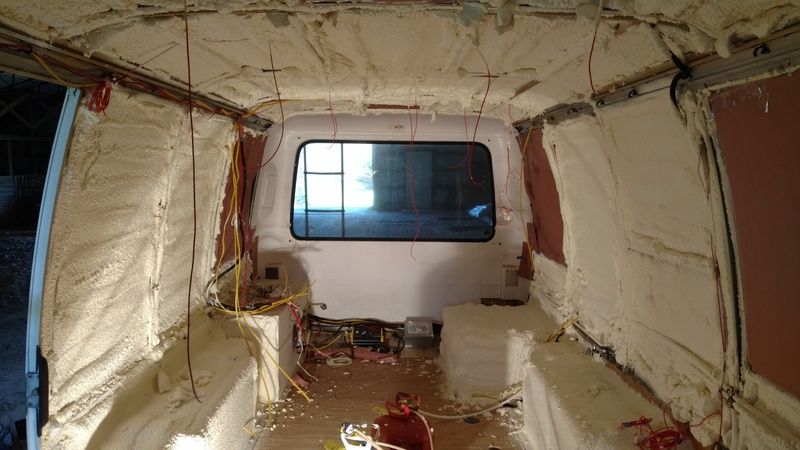
Once I had a solid coat I went back and trimmed the excess off the ribs and anywhere where I sprayed too thick, tried a variety of tools but the best was by far the Japanese Flush Cut Saw (woodworking saw) its just a really thin flexible blade with teeth. Cuts through the foam like butter. Paint scrapers are a no go unless sharpened and then still need a sawing motion to get through it.
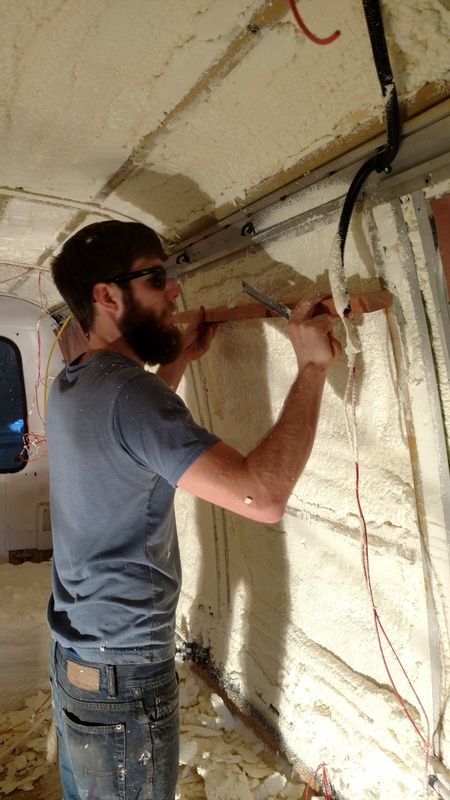
Once I trimmed it once I went back and hit all the low spots again. Trimmed it up again and she's finished!
I didn't get a good after photo but I'll get one tomorrow or next week and post it up.
Total time was from 10am until 5pm with a long lunch break, so I'd put it at a 5 hour job or so.
I think it's safe to say this is going to be a huge improvement over the stock foam, it was so poorly done. The foam i trimmed off of this totaled up to be more than all the foam I took out of it initially.
This means that the majority of the little stuff is finished, and it's finally time to move on to building the interior.
Justin Brady
http://www.thegmcrv.com/
1976 Palm Beach 455
[Updated on: Sat, 02 April 2016 18:47] Report message to a moderator |
|
|
|
| Re: [GMCnet] My 1976 Palm Beach Project [message #298515 is a reply to message #298513] |
Sat, 02 April 2016 19:42 |
tphipps
Messages: 3005
Registered: August 2004
Location: Spanish Fort, AL
Karma: 9
|
Senior Member |
|
|
Justin, one of the vibrating cutters would also do a nice job on the foam. We call it, "the GMC tool.". Does a lot of the little cutting jobs. HF has inexpensive ones. Cordless might be nice.
Disclosed: I have 2, cheap HF and Porter-Cable.
Tom, MS II
2012 Phoenix Cruiser model 2552
KA4CSG
|
|
|
|
|
|
|
|
| Re: My 1976 Palm Beach Project [message #298533 is a reply to message #281079] |
Sun, 03 April 2016 07:27 |
rcjordan
Messages: 1913
Registered: October 2012
Location: Elizabeth City, North Car...
Karma: 1
|
Senior Member |
|
|
Never heard of the Touch & Seal brand and I was wondering about flame spread. And price. So I went looking on Amz
http://amzn.to/231Ltqw
SOLD 77 Royale Coachmen Side Dry Bath
76 Birchaven Coachmen Side Wet Bath
76 Eleganza
Elizabeth City, NC
|
|
|
|
|
|
|
|
| Re: My 1976 Palm Beach Project [message #298773 is a reply to message #298565] |
Thu, 07 April 2016 10:08 |
Justin Brady
Messages: 769
Registered: April 2015
Location: Bell Buckle, TN
Karma: 11
|
Senior Member |
|
|
A little more progress made here.
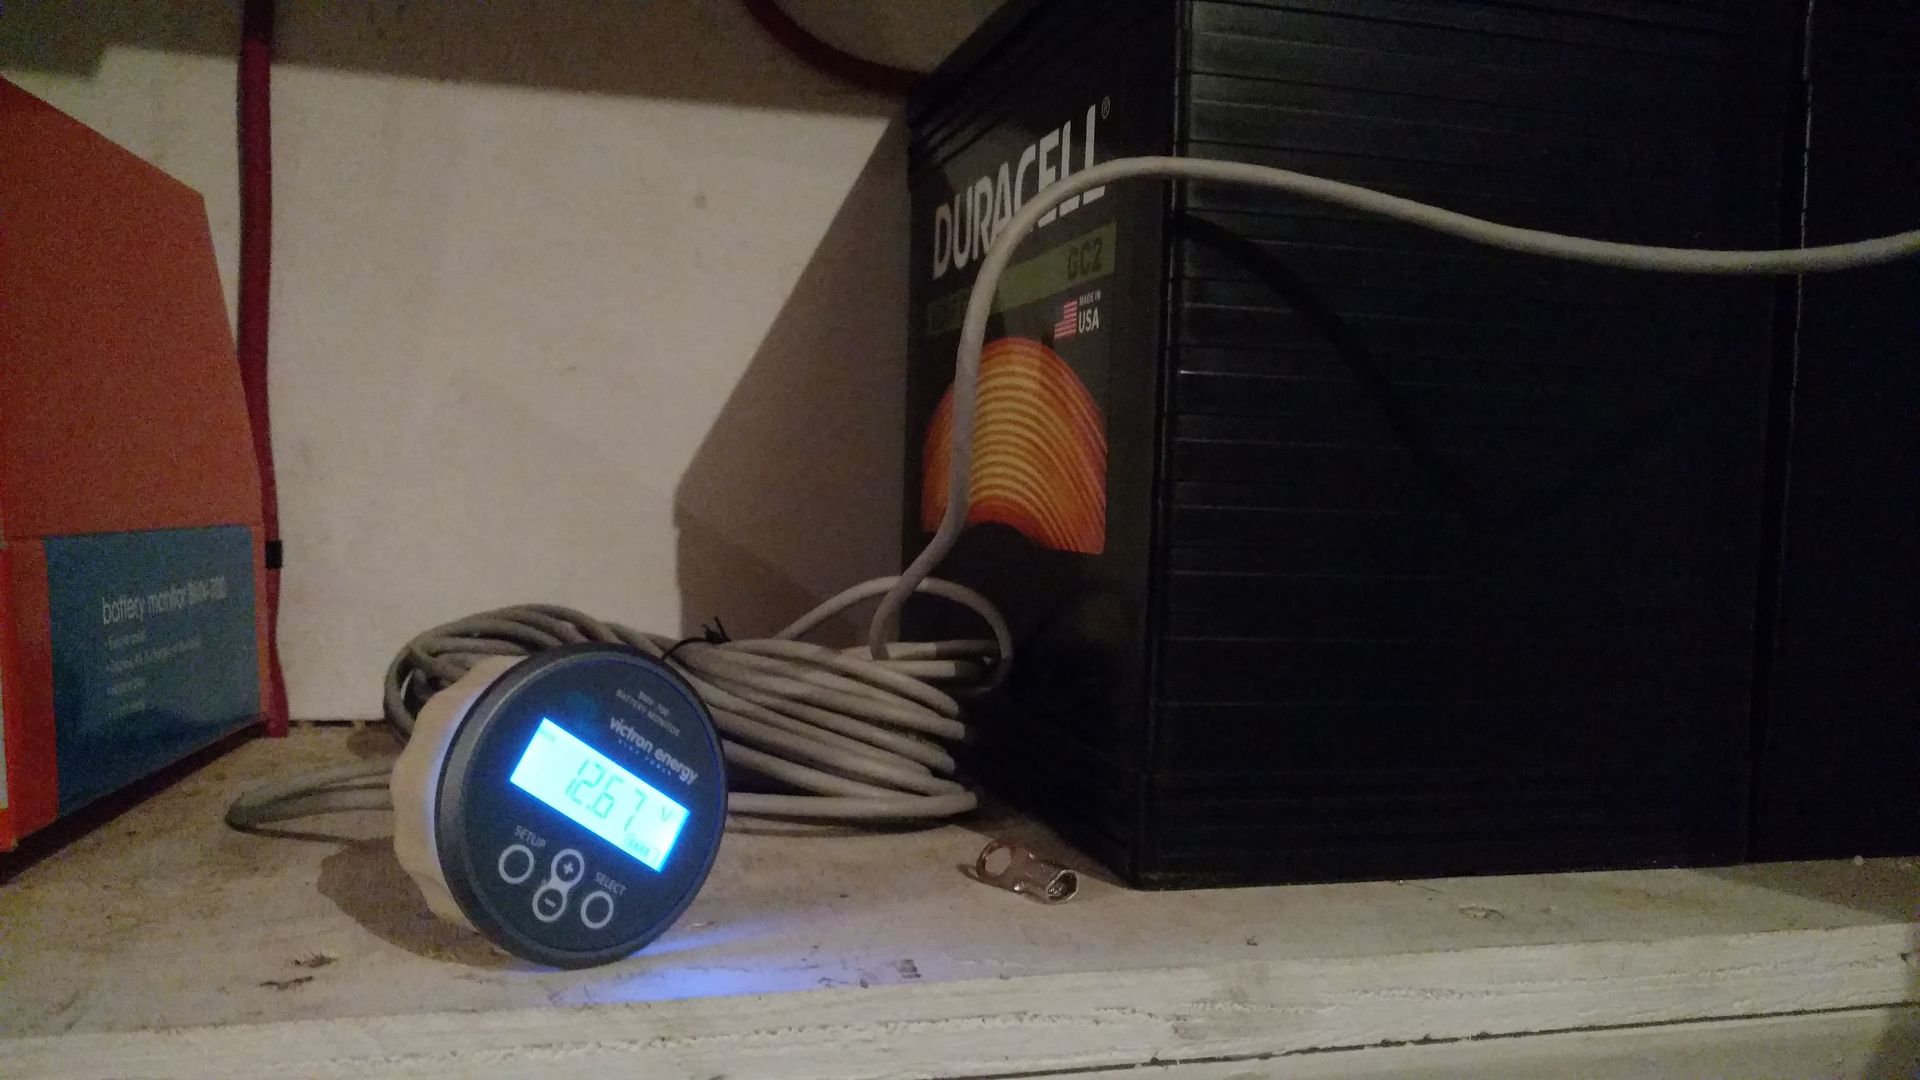
Got the propane tanks mocked up, decided to put them in the center of the compartment to leave room for stuff in the rear where it's a little more protected from spray etc. I may build some shelves back there once I know what I'm going to store in it.
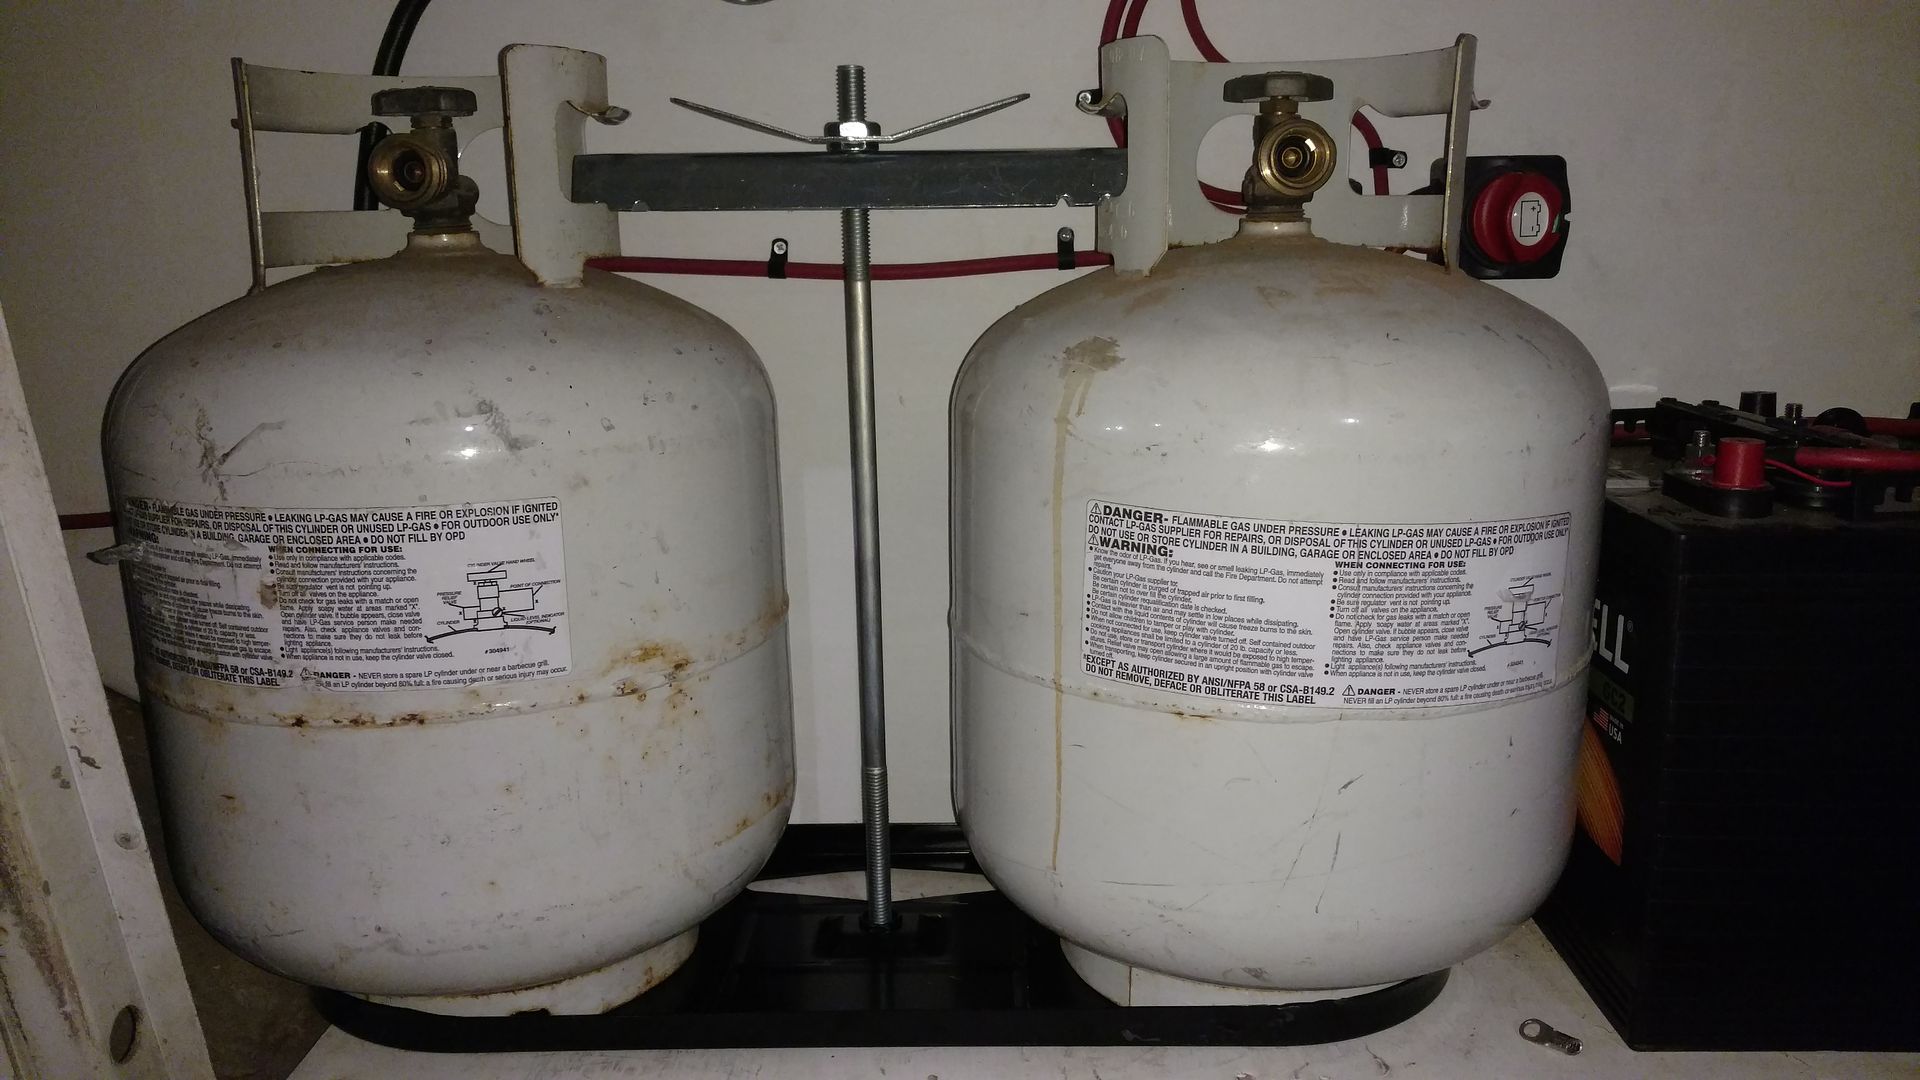
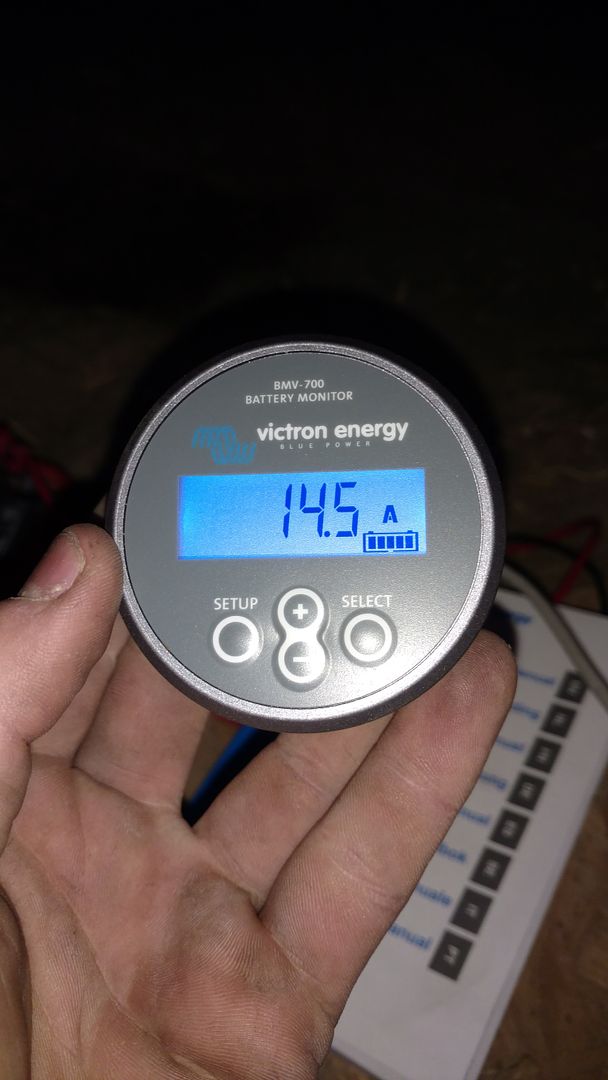
Also installed the Victron BMV700 Battery monitor. Really simple, 500Amp shunt installed in about 10 minutes between the battery negative and ground. Monitors battery charge and discharge, gives time left, watts in and out, etc. Will allow me to keep a good eye on the battery state and monitor charge voltage and amperage from all 3 charge sources (converter, solar, alternator).
As a test I fired up the 455 and let the alternator do her thing, I saw 40 amps charging on the house batts after the combiner connected. This slowly tapered off to 10 or so until I shut her down. All seems to be working well.
I've got an 80 Amp circuit breaker inline between the engine batt and the house batts in case of anything crazy.
Really liking the battery setup so far. Really simple with very few things possible to go wrong.
Justin Brady
http://www.thegmcrv.com/
1976 Palm Beach 455
|
|
|
|
|
|
|
|
|
|
| Re: [GMCnet] My 1976 Palm Beach Project [message #298816 is a reply to message #298808] |
Fri, 08 April 2016 16:31 |
Justin Brady
Messages: 769
Registered: April 2015
Location: Bell Buckle, TN
Karma: 11
|
Senior Member |
|
|
I don't see it being a problem, it's in a well vented enclosure no different than the stock location with lighting and wiring and switches. Don't see how this is much different.
And Matt, for now we are just going with the one battery bank. There's a possibility of another in the generator compartment, but they will be connected with very large gauge wire so the charging shouldn't be an issue unless there's some factor I haven't considered?
Justin Brady
http://www.thegmcrv.com/
1976 Palm Beach 455
[Updated on: Fri, 08 April 2016 16:32] Report message to a moderator |
|
|
|
| Re: [GMCnet] My 1976 Palm Beach Project [message #298823 is a reply to message #298816] |
Fri, 08 April 2016 20:38 |
 |
pjburt
Messages: 436
Registered: February 2016
Location: Fresno, California
Karma: 1
|
Senior Member |
|
|
LP gas is heavy and vents low and the light and switch is mounted high. But, the difference is a battery vs a high mounted switch and light produces volatile gases that, combined with LP fumes, could be disastrous when ignited by a spark. Yes, there is venting. But, is it enough? What happens if a LP leak develops? Or...
Not a smart use of space.
SONICJK wrote on Fri, 08 April 2016 14:31I don't see it being a problem, it's in a well vented enclosure no different than the stock location with lighting and wiring and switches. Don't see how this is much different.
And Matt, for now we are just going with the one battery bank. There's a possibility of another in the generator compartment, but they will be connected with very large gauge wire so the charging shouldn't be an issue unless there's some factor I haven't considered?
Jerry Burt Fresno, CA.
73 Gmc 26' Canyon Lands
Members: FMCA - GMCMI - GMCWS
A truly happy person is one who can enjoy the scenery on a detour.
|
|
|
|
|
|
 ) 2 Votes
 GMCforum


